


.png)


![[HOONIGAN] Ken Block's GYMKHANA NINE](https://img.youtube.com/vi/_bkX5VkZg8U/maxresdefault.jpg)


![[HOONIGAN] KEN BLOCK'S GYMKHANA SEVEN: WILD IN THE STREETS OF LOS ANGELES](https://cdn.motor1.com/images/mgl/2KlO4/s1/ken-block-london-tour-directors-cut.jpg)


Carrying out a minor service
Step by step guide to carry out a minor service on your car
Minor Service 101
Brought to you by the guys and girls @specialised.engineering
Replace oil/air filters oil and coolant
Difficulty 1/5
Tools 1/5
This guide is designed to show you how to carry out a minor service on your car with just a few basic tools and simple step-by-step instructions. As it would take an age to write a guide for every make and model of car we will try to make these as generic as possible and advise on any major differences between different makes.
Every car with an internal combustion engine has three main elements that require regular servicing.
Engine oil, Oil filter and Air filter
Changing these items at the manufacturer-recommended intervals is key in maintaining a healthy engine that will last for 100,000s of miles. This is even more essential when you have a turbocharged engine as many of the causes for turbo failure will be due to poor/contaminated oil, dirty air filter and lack of regular maintenance in general.
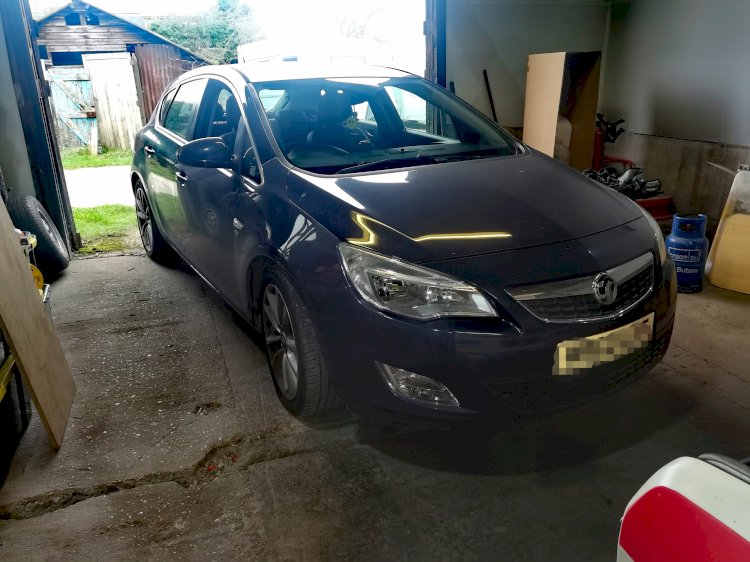
We will be looking into turbos in more depth in an upcoming article but for now, let's just keep it simple and get back to the service. For this guide, we'll be using a 2010 Vauxhall Astra 2.0cdti.
Parts Required
- Air Filter
- Oil Filter
- Engine Oil (Refer to vehicle handbook for grade and quantity)
- Anti-Freeze/Coolant
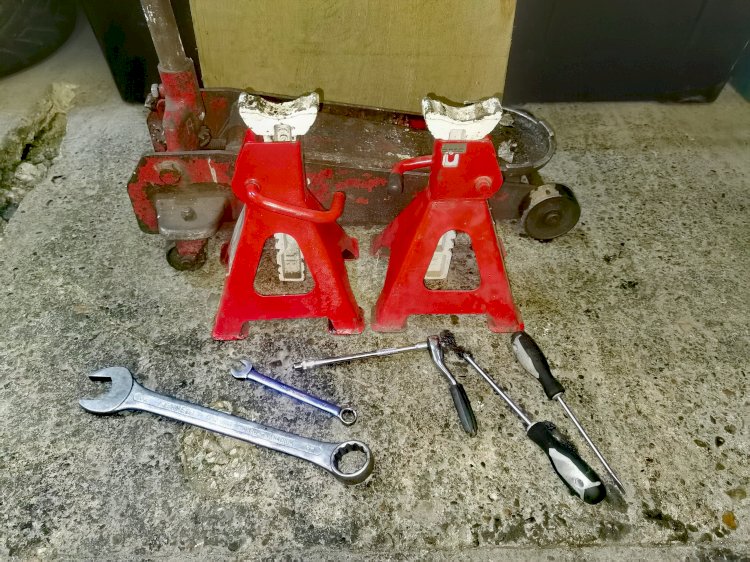
Tools Needed
(Tools needed will differ between makes and models)
- Trolley Jack
- Axle Stands
- 5 Litre container for oil
- 5-litre container for coolant
- Phillips Screwdriver
- Flat Blade Screwdriver
- 7mm Socket with extension
- 13mm Ring Spanner
- 32mm Ring Spanner
- Two clean funnels for new oil and coolant
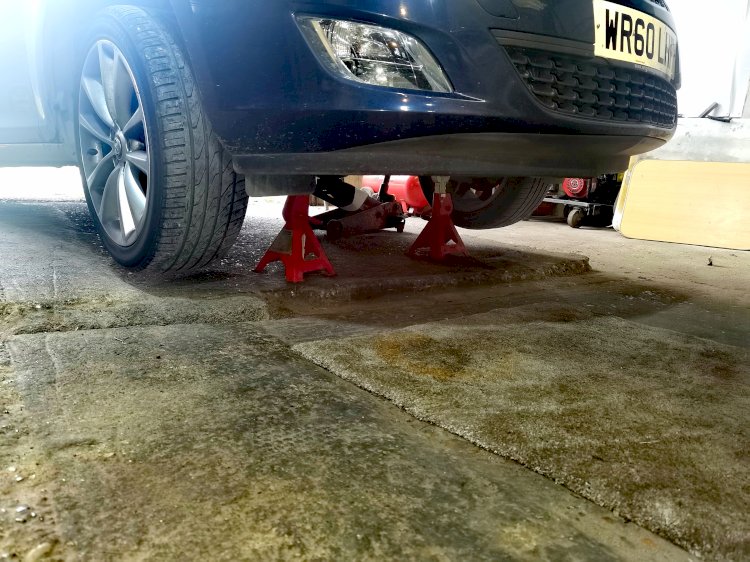
Step One
Raising the car and supporting on axle stands
Before beginning the service you want to make sure the car is up to optimum running temperature as this will thin the oil and aid with draining later.
Also as winter approaches and the temps start to drop we will be replacing the coolant with some fresh good quality all season coolant/anti-freeze.
Jack the front of the car up on the manufacturer recommended jacking points.
(This can be found in the vehicle handbook)
Once jacked up high enough to allow access under the car use an axle stand to support the car.
(Chassis rail or subframe mounting point are good strong areas)
Once supported, move to the other side of the car and repeat.
Ideally, you'll want the car slightly lower on the engine sump plug side to aid with oil draining but if you're unsure of where your sump plug is then just jack the car up so it's sitting level.
Changing the coolant
As previously mentioned with winter approaching and not knowing the age or condition of the coolant it's good practice to change this before the temps drop to freezing.
With the engine up to temperature now is the best time to drain the cooling system like the thermostat on the engine block will be open and you will be able to drain the most fluid from the system compared to when it's cold and the thermostat is closed.
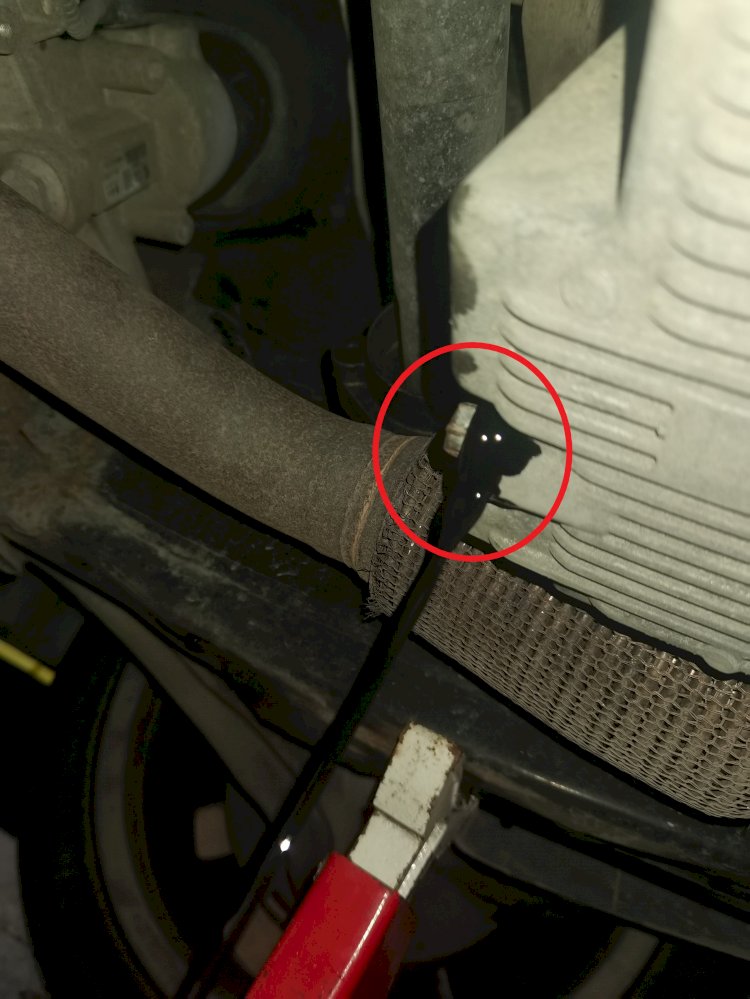
Most modern cars will have a drain tap on the bottom of the radiator normally on the rear or side of the housing; on this Astra, it is on the right-hand side.
Place the container beneath the drain and undo the tap being careful not to get burnt on the nearly boiling coolant leaving the radiator.
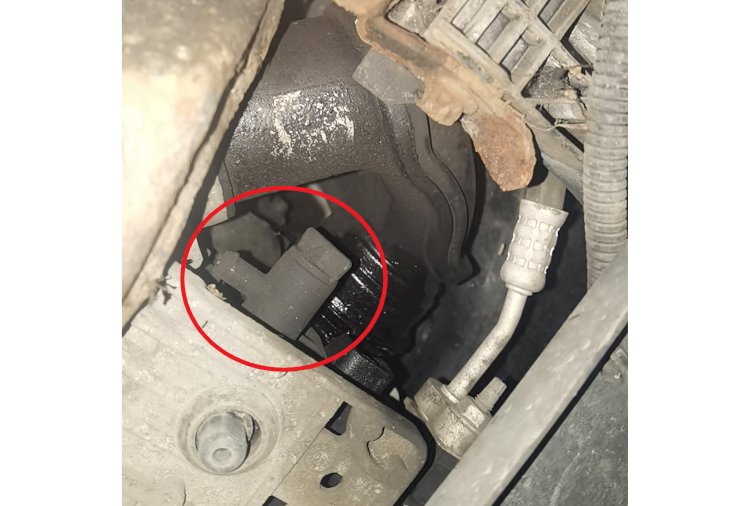
Step Three
Draining the engine oil and removing the oil filter
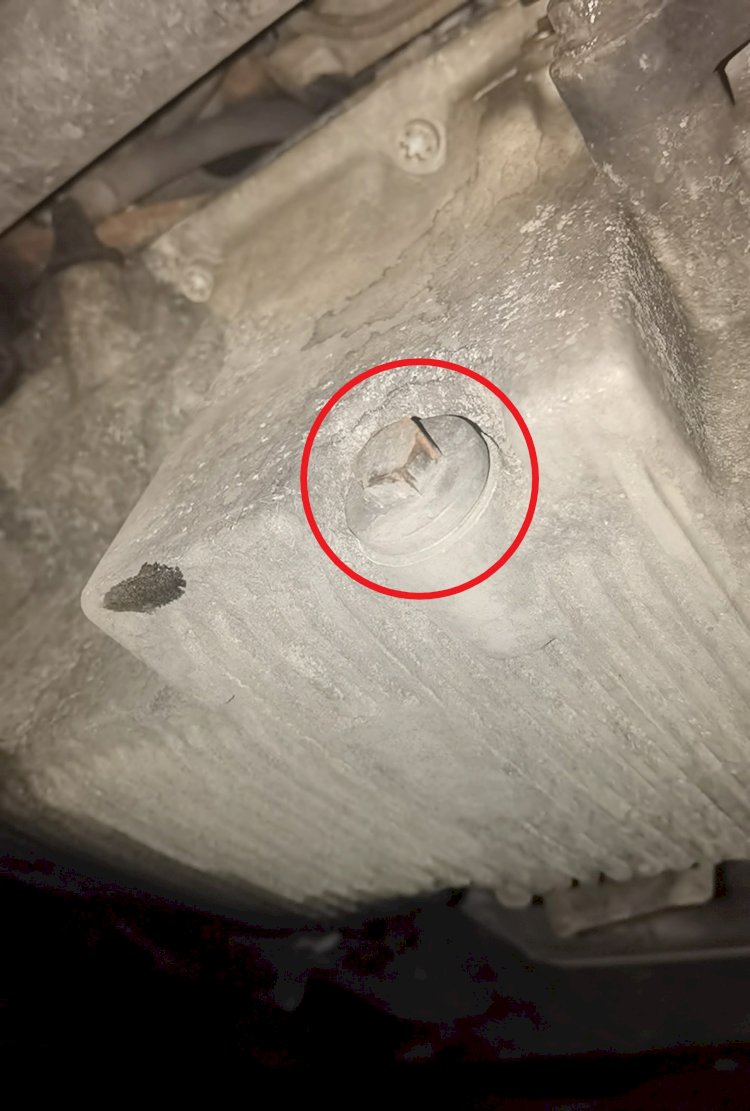
On the rear of the engine sump pan, you'll find the oil drain plug, these come in a variety of designs, in this case, it's a 13mm hex head so we will be using a 13mm ring spanner for removal.
With a container below the sump undo the drain plug again, being careful of the hot oil that will come out.
To aid with the draining remove the dipstick slightly and take off the oil cap on top of the engine.
REFIT and TIGHTEN SUMP PLUG
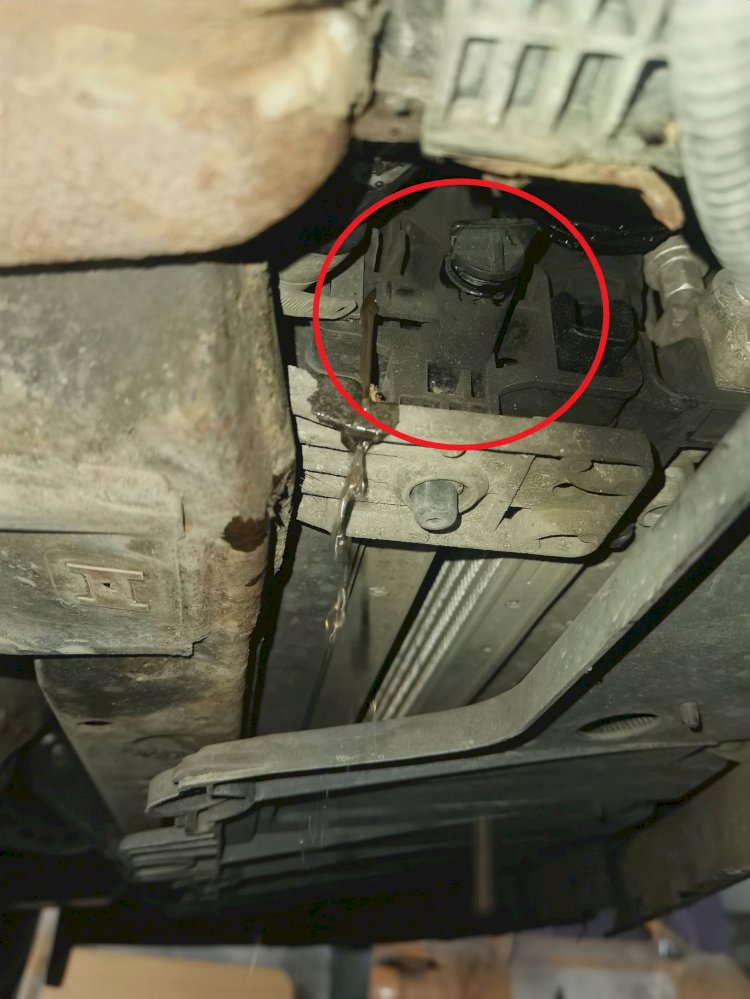
Step Four
Replacing the oil filter
With the oil drained it's time to remove and replace the oil filter element.
Most oil filters are either a metal canister that screws to the engine block or a cotton filter that sits inside a housing bolted to the engine.
In our case, we have the latter and on our Astra, the oil filter is in a housing on the rear right of the engine just above the driveshaft.
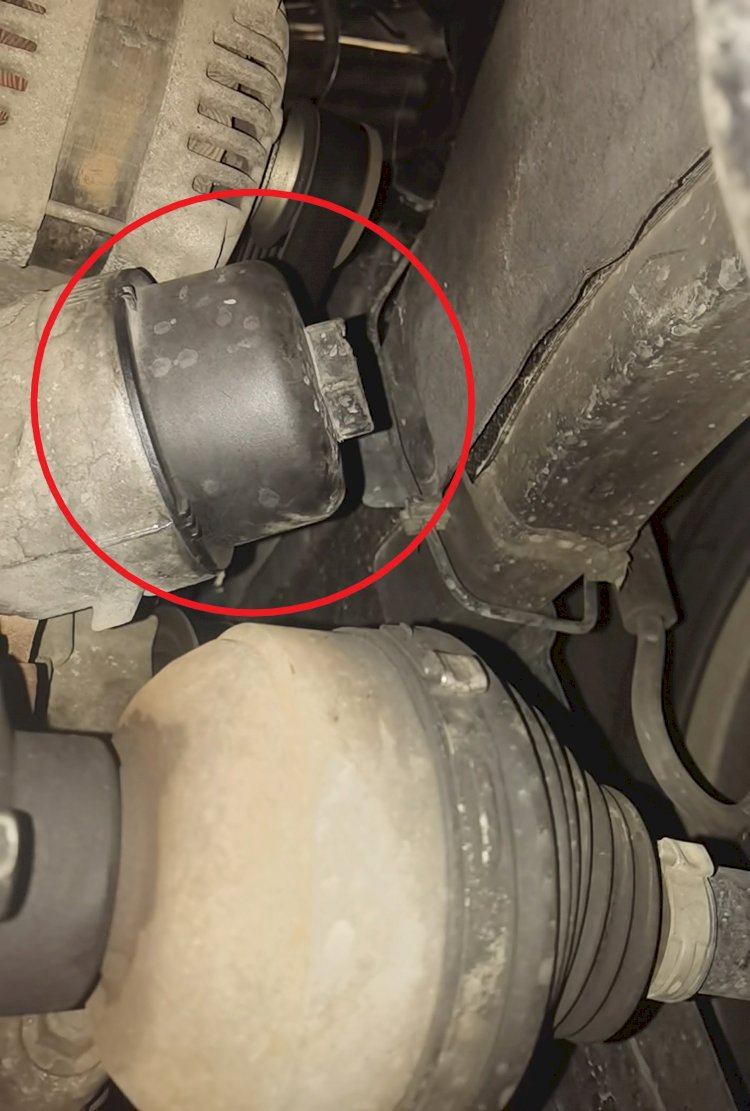
Undoing the filter housing will require a larger than normal spanner, in this case, a 32mm spanner or socket is needed to undo the housing.
Undo the housing being careful of the residual oil inside, as this was above the driveshaft and exhaust we covered them with an absorbent cloth to stop any spillage.
Separate the two parts of the filter housing and discard the old filter and o-ring around the top of the housing lid.
Clean the filter housing and insert the new filter and o-ring. Apply a small amount of oil around the edge of the new o-ring to aid with re-assembly.
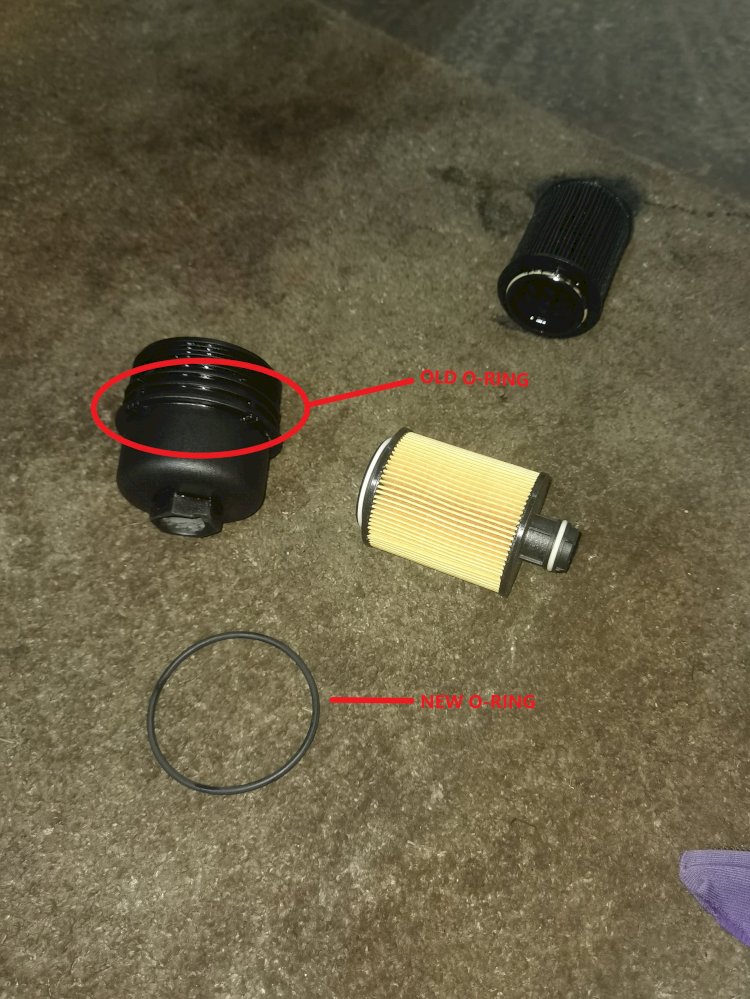
Screw the filter housing back together until hand tight.
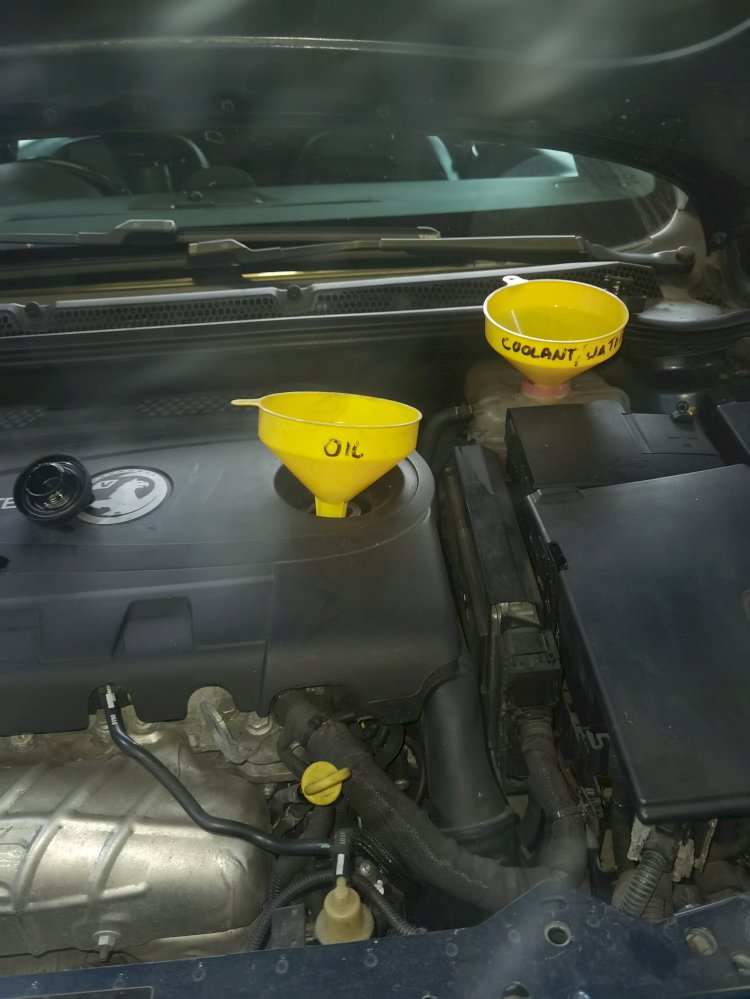
Clean any spilt oil and you're ready to refill the oil and coolant.
This Astra takes 4.5 litres of oil so we will begin by pouring that into the top of the engine using a clean funnel.
We pour in just short of 4.5 litres as we won't get a true reading of the oil level until the engine has been run and its circulation around the engine fills the oil filter.
Refit the oil filler cap.
Next up it's time to do the coolant, again using a clean funnel begin filling the coolant expansion tank.
This will take a little while to fill as the coolant drains down the radiator.
Keep filling with coolant until the expansion tank level stops dropping, this is as far as you can go for now.
Step Five
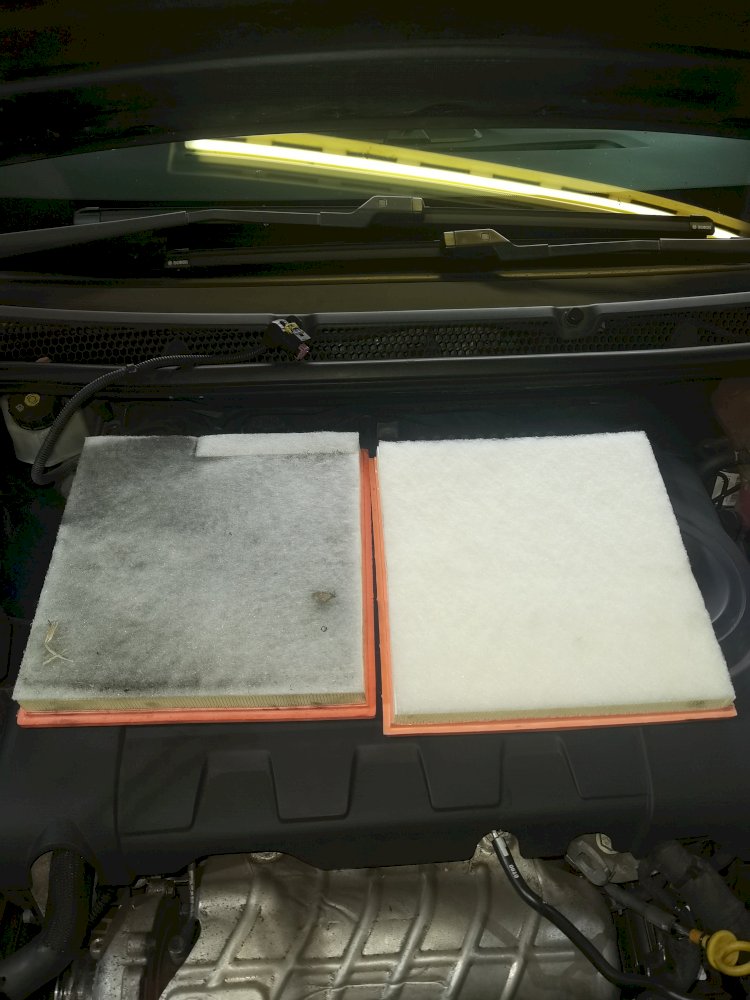
Replacing the Air Filter
The last job to do before firing the car back up is to replace the air filter.
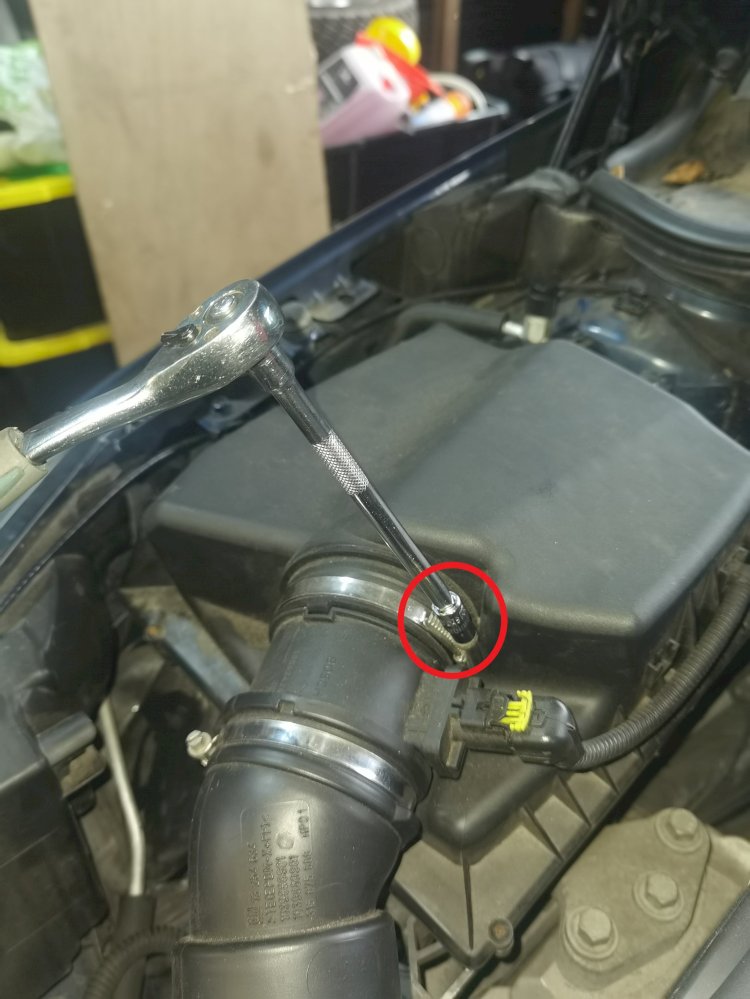
We began by undoing the jubilee clip that holds the air pipe from the filter box to the turbo. For this, you will need a 7mm socket with extension or a flat blade screwdriver.
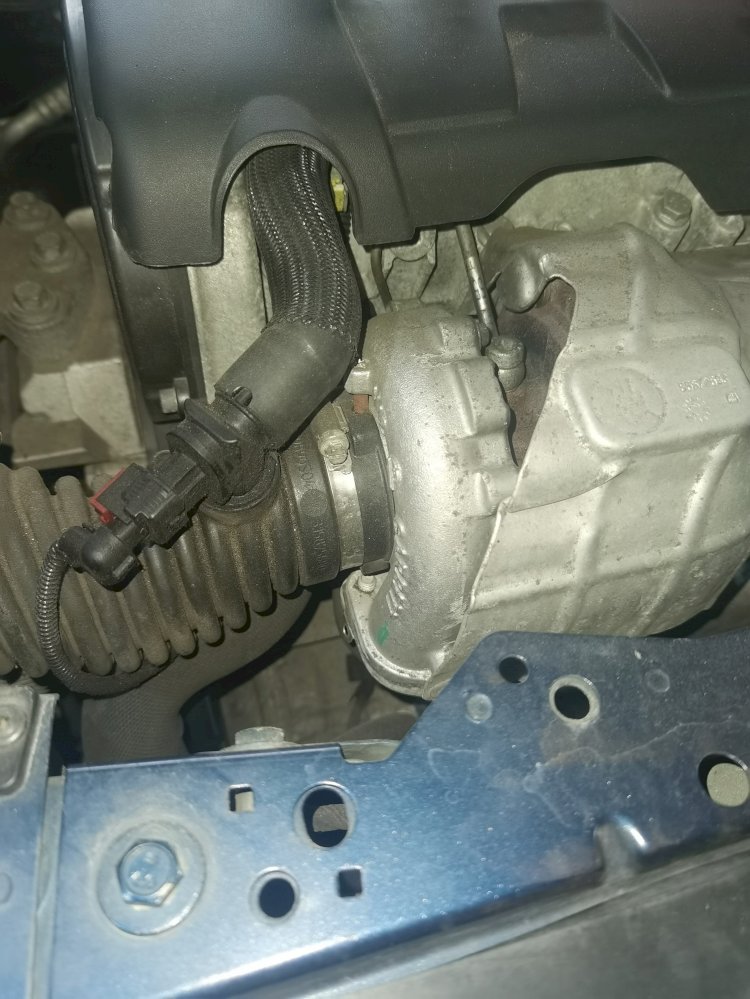
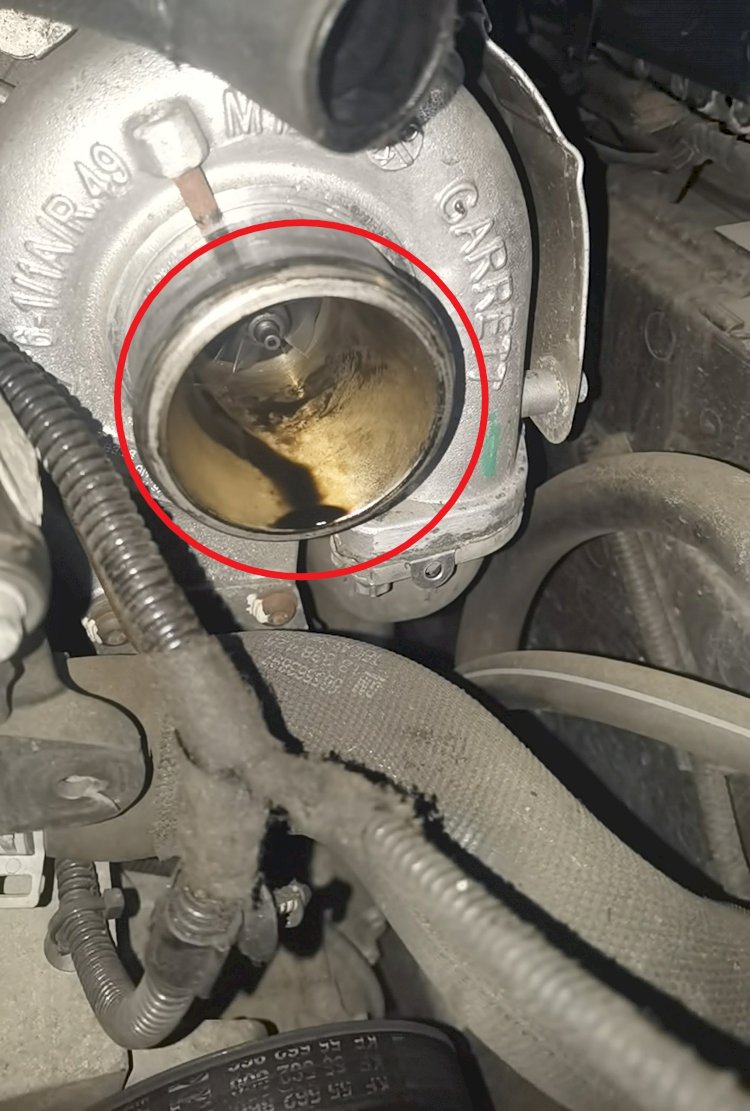
Due to the close and easily accessible turbo on this Astra, we decided to remove the other end of the intake pipe just to have a quick inspection of the compressor side of the turbo and low and behold there is oil leaking out of the turbo so this will need investigating and rectification in the near future.
(Look out for a future article where we cover the importance of oil and how critical it is in the life of a turbo.)
Back to the job in hand, now with the air pipe out of the way it's time to undo the screws holding the top of the airbox down.
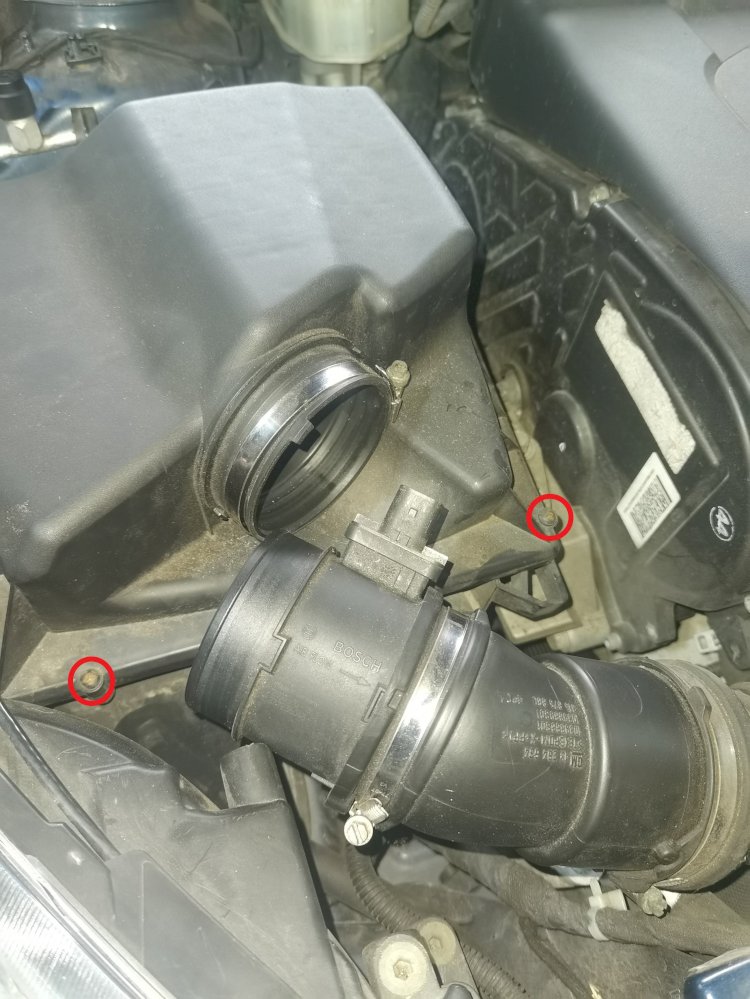
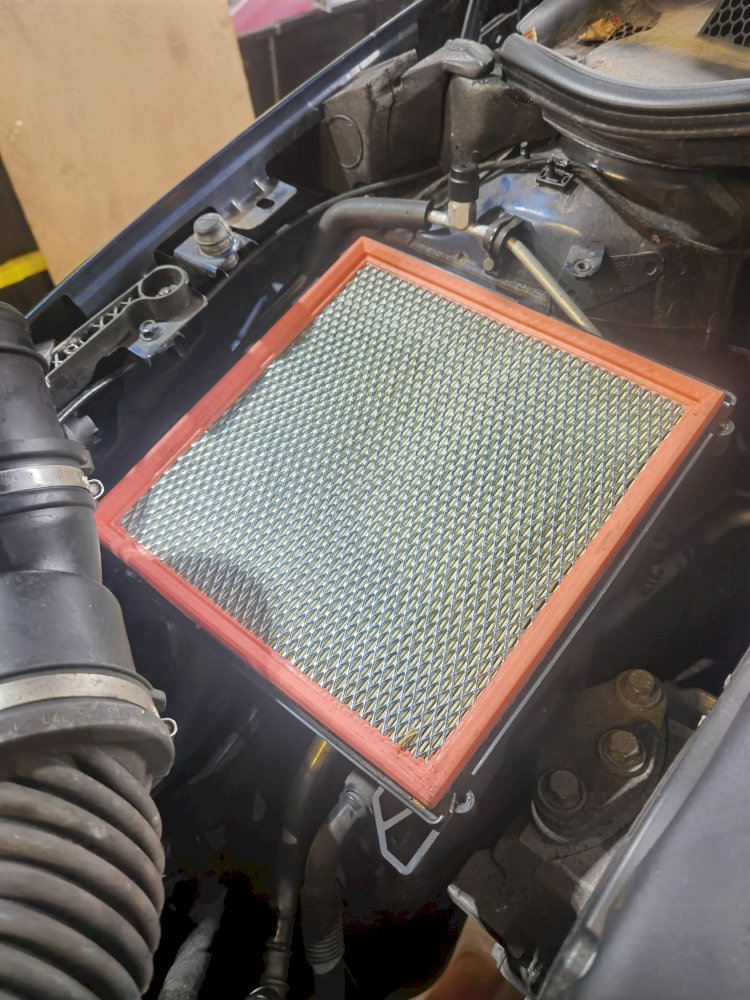
With the airbox lid removed it's time to take out the old filter and replace it with the new one.
Before putting in the new filter it's always good practice to remove any debris inside the airbox, compressed air with a blowgun works best, if not remove the bottom half of the airbox and turn it upside down to remove the debris.
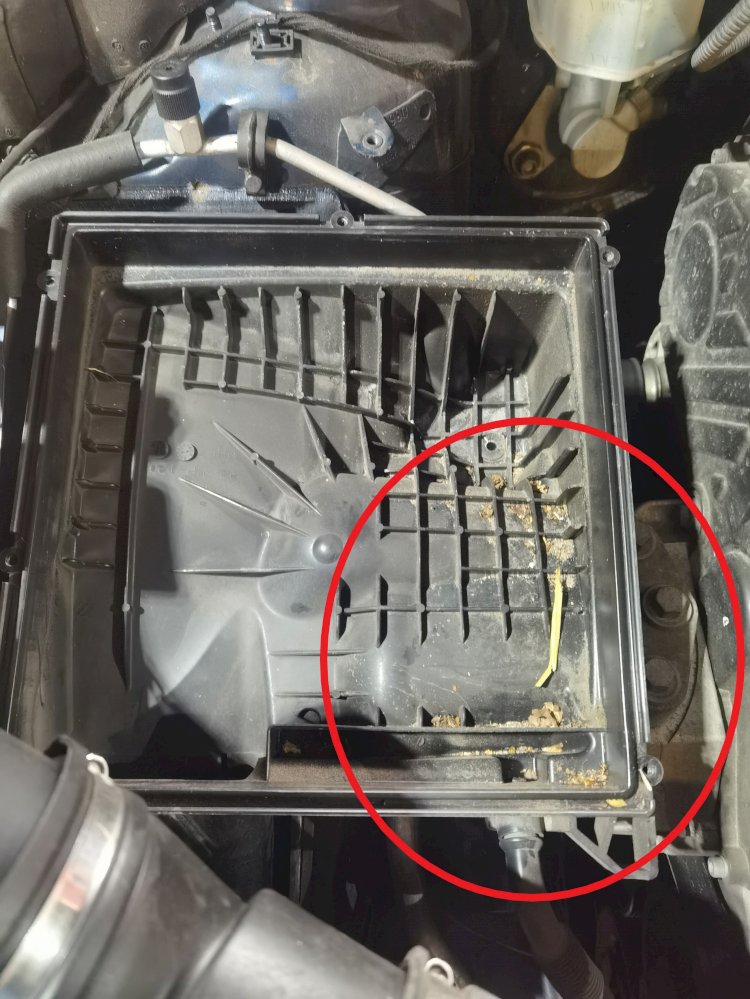
Install the new filter and refit the airbox lid and air pipe to the turbo.
With everything now changed and back together, it's time to put the car back on the ground and fire it up.
Once the car is running check for any leaks and continue to run the car until it reaches optimum operating temperature, this will open the now-closed thermostat on the engine block and allow coolant to flow through the waterways and bleed any air in the system.
Once the coolant gets all around the system you should see a drop in coolant levels in the expansion tank.
Switch off the car and allow the oil time to drain back into the sump, check the oil level on the dipstick as it most certainly would have dropped and will need topping up. The same will also apply to the coolants level so top up according to the max fill line on the expansion tank.
Congratulations
You have just completed a minor service on your car
We hope you have enjoyed this guide and found it helpful.
Please keep an eye out for more helpful articles hitting the site soon.

What do you think? leave your comments in the comments section at the bottom of the page
'The future is bright as long as we can still Smell the Fumes'
Check out our Google News give us a Follow
All of our Magazine can be found on Amazon, they Print and Deliver worldwide, Stance Auto can not be held responsible for the final print, all complaints and returns must be directed to Amazon.
UKTM no: UK00003572459
 Like
3
Like
3
 Dislike
0
Dislike
0
 Love
3
Love
3
 Funny
0
Funny
0
 Angry
0
Angry
0
 Sad
0
Sad
0
 Wow
0
Wow
0