


.png)


![[HOONIGAN] Ken Block's GYMKHANA NINE](https://img.youtube.com/vi/_bkX5VkZg8U/maxresdefault.jpg)


![[HOONIGAN] KEN BLOCK'S GYMKHANA SEVEN: WILD IN THE STREETS OF LOS ANGELES](https://cdn.motor1.com/images/mgl/2KlO4/s1/ken-block-london-tour-directors-cut.jpg)


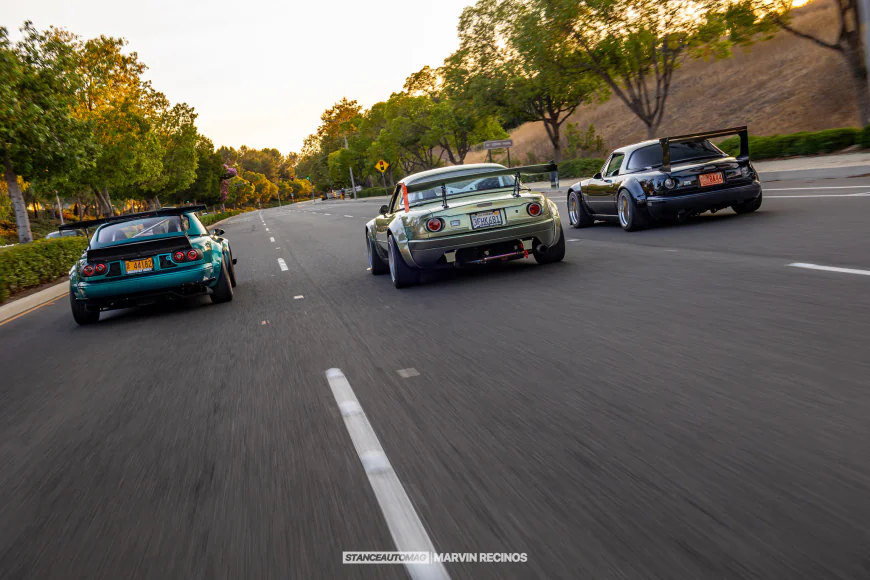
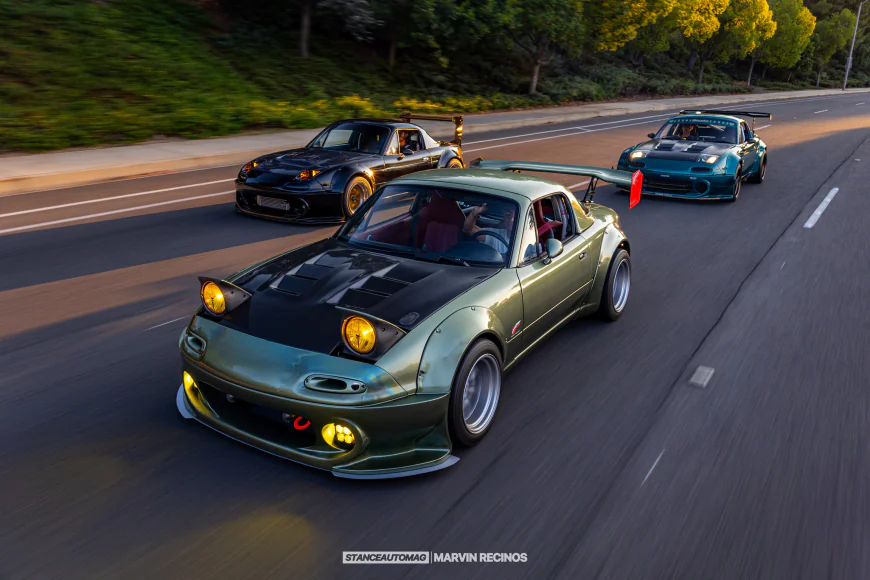
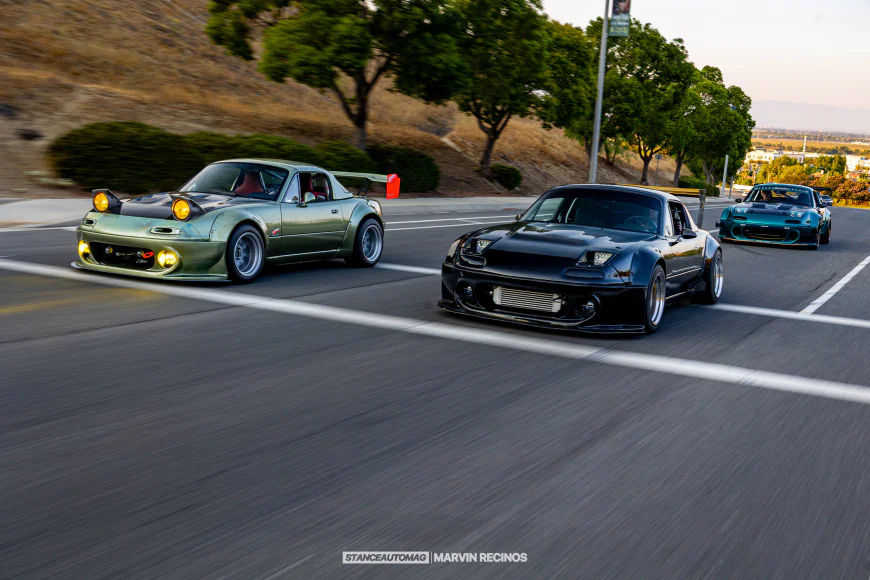
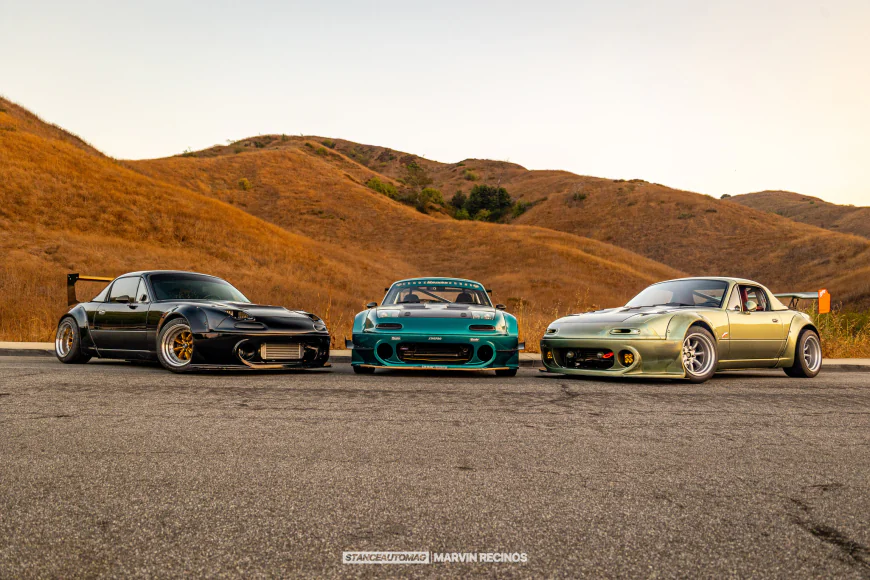
NA Miata Stories: Supercharged, Turbo & ITB Rare Editions
Hear directly from three Miata owners—Patrick, Dedin, and Nick—as they share their builds in their own words: Supercharged, Turbocharged and ITB Sayonara Limited Nogami Project GT-L Widebody

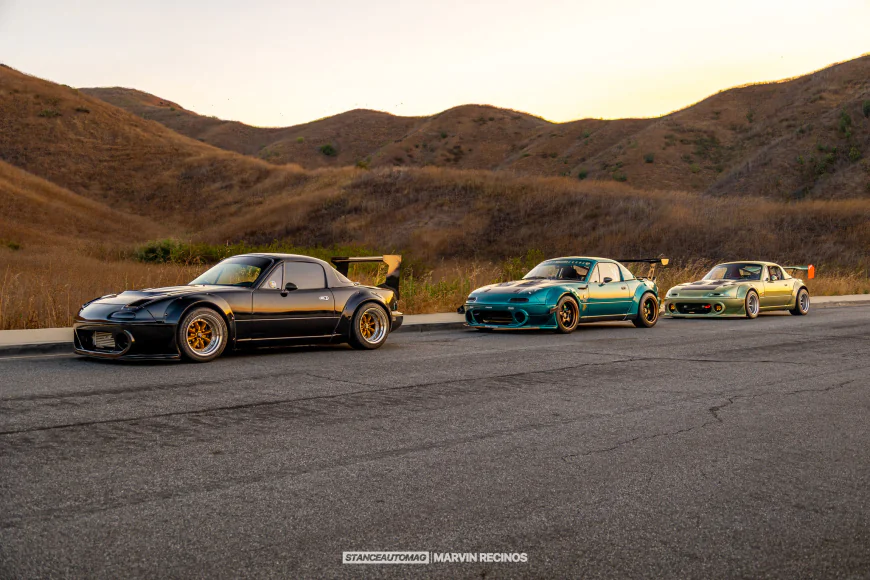
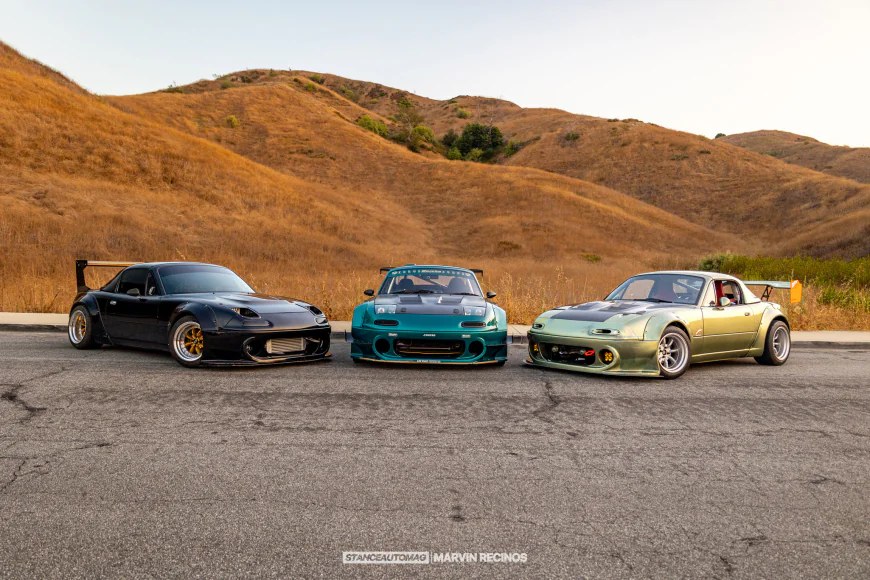

Patrick Vidal 1993 Supercharged Mazda Miata
Dedin Johnson 1991 Mazda Miata Turbocharged
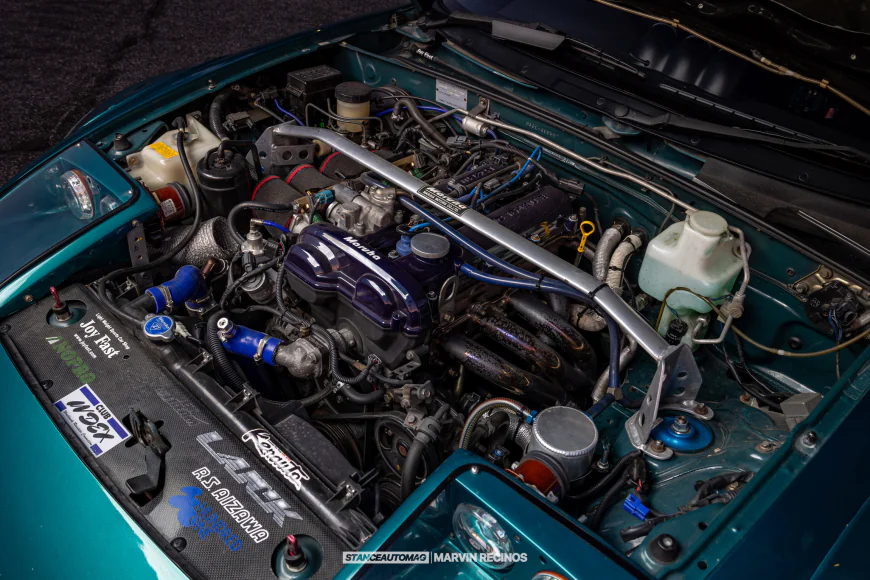
Nick Dryden 1997 Eunos Roadster 1/700 SR (Sayonara) Limited edition (ITB)
Instagram:@Pdr_93le @Theecrazyblackman @Crowncapper
Photographer: Marvin Recinos
Instagram: @mr2mivin
Performance Stats:
(Patrick) 230WHP Supercharged
(Dedin) 370hp & 326 Torque on Torco t98 320hp & 290 Torque on E85 273hp & 237 Torque on 91 pump gas Turbo
(Nick) 210 WHP ITB
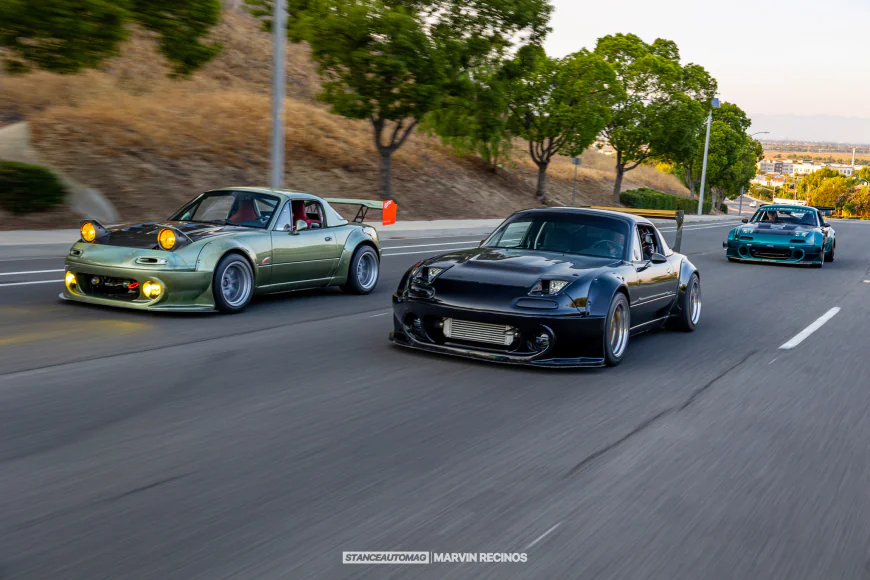
The NA Miata: A Car With a Million Voices
The Mazda MX-5 Miata has been built, modified, and reimagined in countless ways. But no two owner stories are ever the same. Below, Patrick, Dedin, and Nick share their builds in their own words—unedited, unfiltered, and true to the heart of Miata culture.
Patrick Vidal – Supercharged SoCal Roadster
My name is Patrick Vidal, and I'm a freelance Visual Effects Artist based in Los Angeles, California. Between work and life in general, when I find myself with the time and energy, I enjoy driving the mountain roads around the city, and with enough prep and planning, I like driving track days around SoCal. Keeping my car well-maintained and ready for a drive is very important to me.
Why this Car, what has been done to customise it, and describe the build?
My Miata was the platform I used to learn how to do performance driving. My very first mods were safety-oriented, so that I could attend track days straight away. That came in the form of a Blackbird Fabworx GT-3 6-point rollbar, harnesses and a bucket seat. Back in the day, Moti Almagor was a huge inspiration for me to go down this path.
Get the safety equipment, and focus on getting seat time and improving the driver, before further dumping money into the car for no reason. As I got more comfortable, I upgraded to 200 treadwear tires, better brake pads, and better brake fluid. Over the years, I've tried many different combinations of tire, pads, and fluid.
Suspension and wheel mods came later, in the form of Tokico Illuminas and RPF1s, in 15x8 +43. This is basically all you really need to have fun with a Miata at the track. I enjoyed the car like this for several years. Little by little, I would buy parts for the car to fit my style and taste, but the basic build of the car stayed the same.
Only after several more years, and as I was becoming more comfortable with the cost and scope of introducing forced induction, I pulled the trigger on a FastForwardSuperchargers TVS900 kit that is California CARB legal. This happened during the COVID-19 lockdown, so it took so much longer to complete than it normally would have. This gave me time to also pull the trigger on the widebody kit and paint job. The car is very different now, but being track-ready is still the very top priority for me.
What do you think makes your car Unique, and what is it like owning and driving it?:
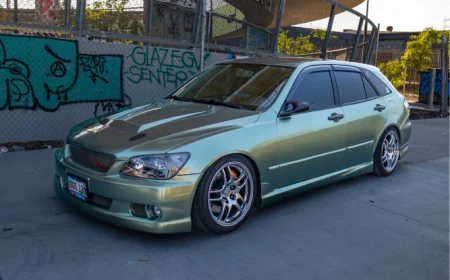
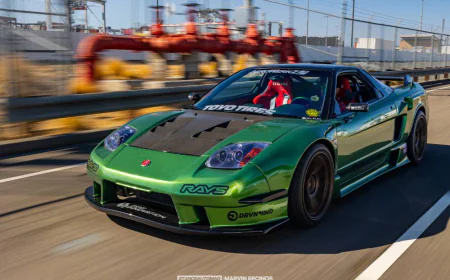
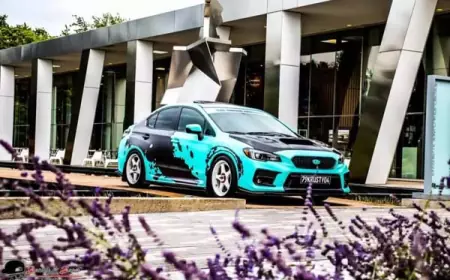
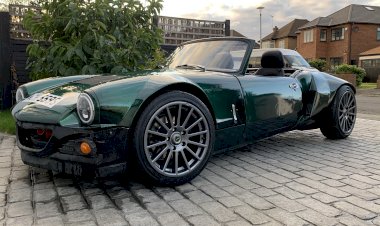
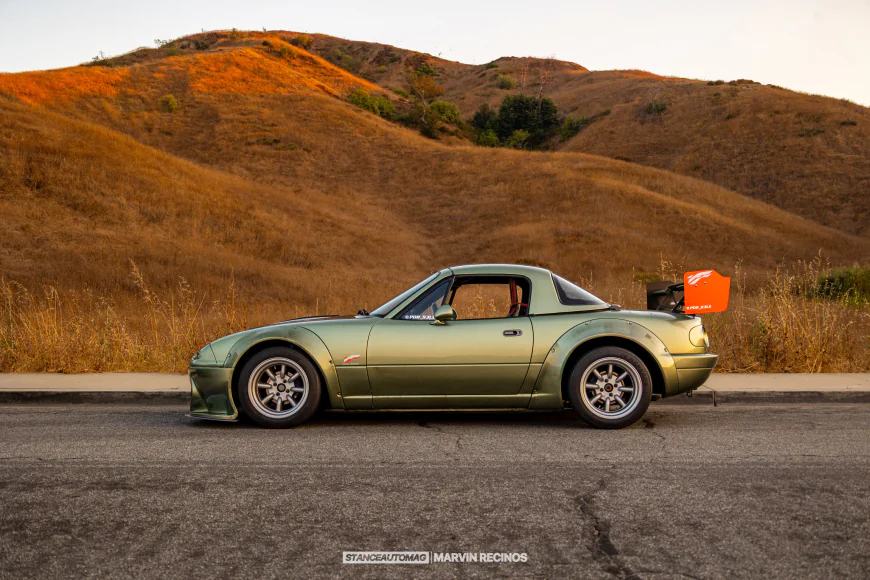
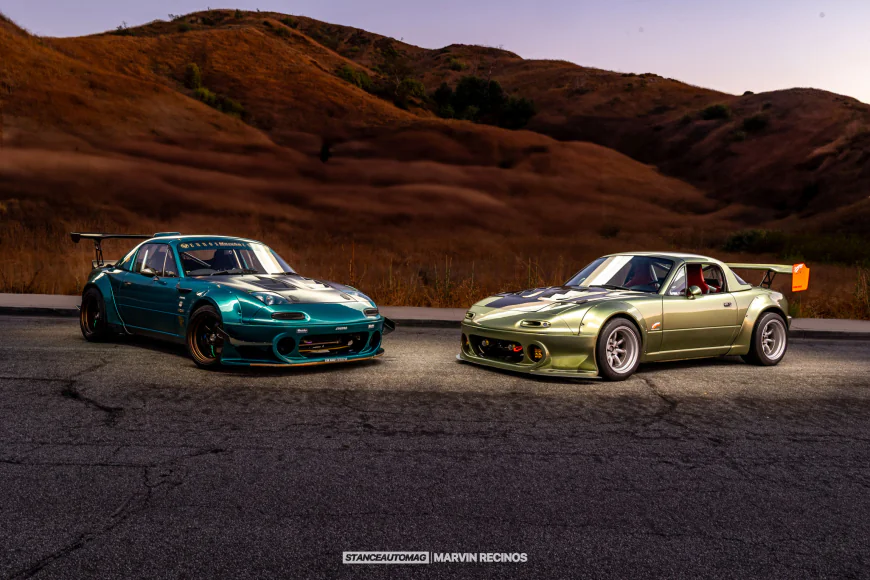
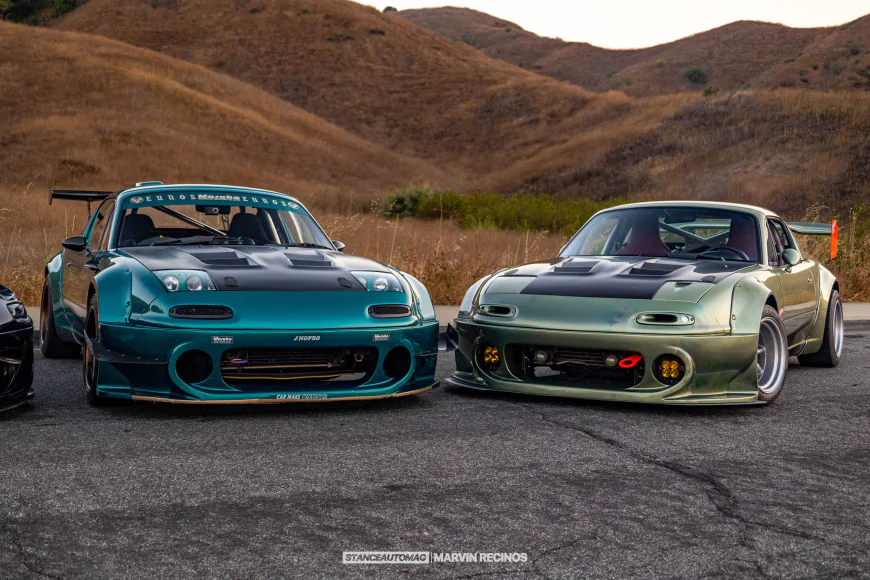
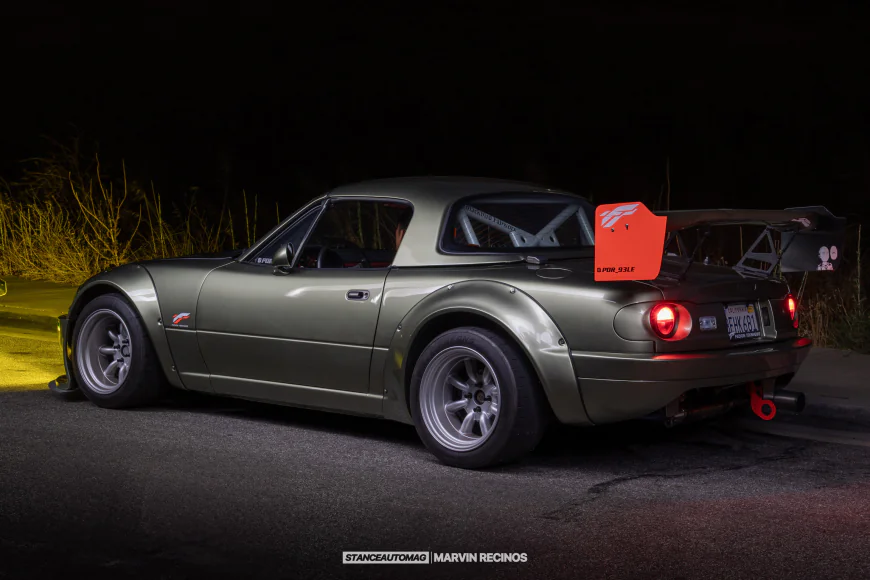
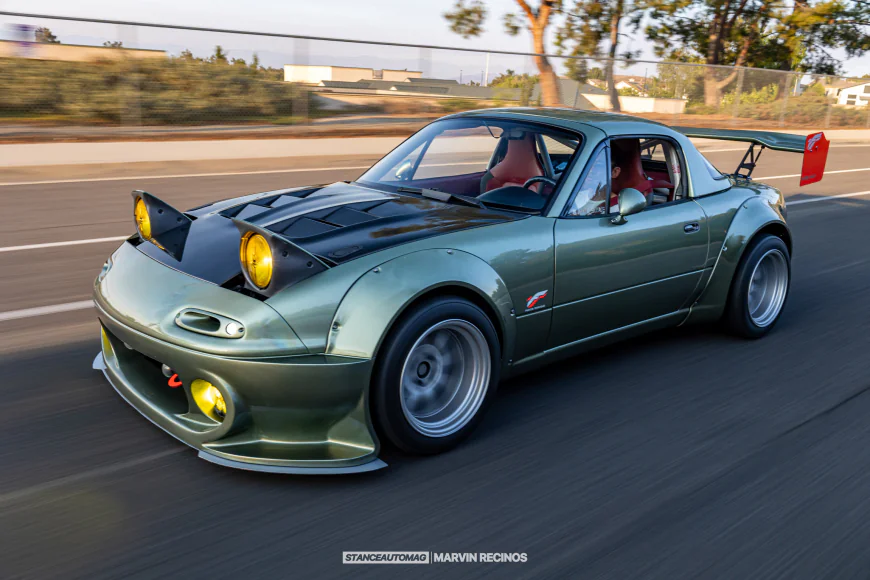
The Nopro GT-L Widebody kit and Millennium Jade paint job are what I think make my car unique. The body kit is an uncommon piece from a company that raced in JGTC from 97 to 98.
They were the only team to campaign an NA Miata in the series, and I find that particularly significant that they put the NA Miata on the same stage as legends like the GTR and Supra. I picked Millennium Jade simply because it was a color that I always loved. I know the GTR that the color was originally made for served the color well by having sharper angles that gave the paint very good contrast. I'm glad to see that it also presents very well on a round car like the NA. I like that Millennium Jade is a subtle green and very metallic.
It can take on the colors of whatever environment it is in, and the fine metal flake brings out the details even in darker scenes. I am an artist and photographer, and I love that this color, depending on the lighting, can look more yellow, or more green/blue, and sometimes very grey/silver.
Patrick’s Build List
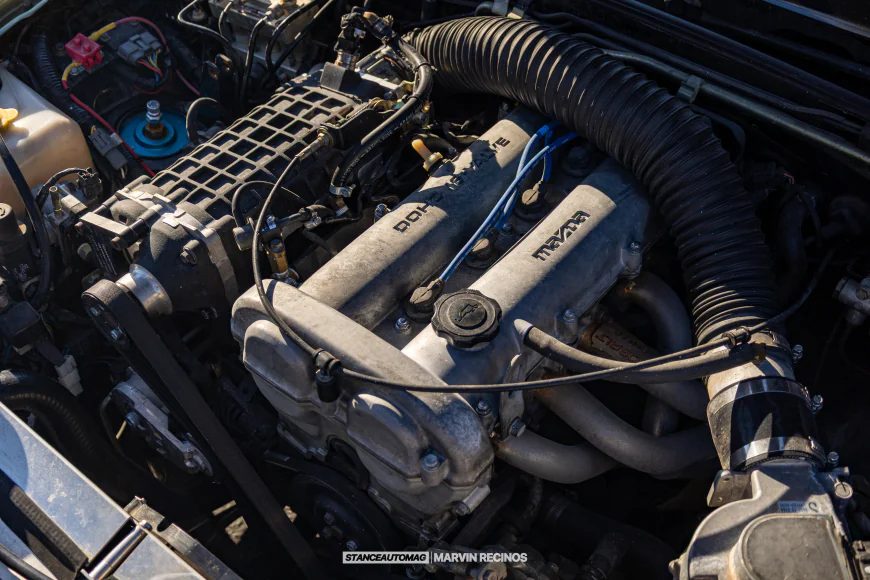
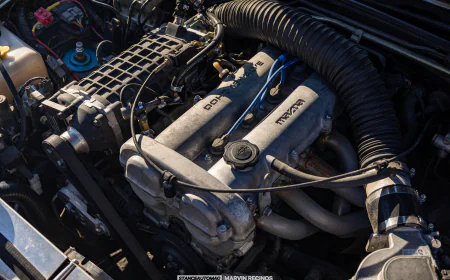
Engine: 1.6L B6ZE, FastForwardSuperchargers Eaton TVS 900 kit, Cobalt Ceramic Coated 4-2-1 header, Maruha x Yoshimura Rayo Veloz Cat-back Exhaust.
Interior: 6-pt GT-3 Rollbar by BlackBird Fabworx. Lotus Elise Probax seats in red diamond-stitched leather, a Lotus Trim Shop special option. I also occasionally swap in a bucket seat and harness. Gauge Cluster by Art Works Dewa, Nardi ND Classic Steering Wheel, and a shift knob by Car Make Corns. Vent rings, window switches, light switches and HVAC faceplate by Revlimiter. Radio deleted for mounting AEM Classic temp gauges and X-Series Wideband. Bose Mini Soundlink 2 in lieu of a DIN-mounted radio.
Exterior: NoPro GT-L Widebody Kit, Zoom Engineering rear bumper, APR GTC 200 Carbon Fiber GT Wing with Singular Motorsports endplates. Sev Marchal 722 Starlux headlights. Vented headlight lid, and rear tail light finish panel by Garage Vary. Vented carbon fiber hood by Zeromotive. Replica Zest turn signal intakes, replica M2-1028 style side mirrors.
Suspension and brakes: Watanabe R Type in 15x9.5 -19, Nankang CRS in 245/40/15, OEM brake calipers with Endless MX72 pads and RBF 660 fluid. Coilovers by Circuit Sports.
Who Did the Work?
Safety and Interior set up by Moti Almagor, at Blackbird Fabworx in Canoga Park. Engine, Supercharger, Bodywork and Paint by Alex Garcia and his team at Fuzion Teknique in Gardena. NoPro bodykit sourced by Kyle Ranauro at Pro Shop Noble in Riverside.
Future Plans
I will continue to track this car, and keeping the car well-maintained is top priority. On some recent drives through the Malibu mountains, I've come to see that I have clearance issues during hard cornering. I will be working and adjusting the build to address that. I'm currently using Endless MX72 brake pads on the OEM 1.6L brake rotors and calipers, but I might be swapping in bigger front brakes, which might also mean a different set of wheels and tires.
Shout Outs
- Fuzion Teknique | IG: fuzionteknique | Website
- Blackbird Fabworx | IG: blackbirdfabworx |
- Pro Shop Noble | IG: pro_shop_noble |
- Lotus Sports Cars of Southern California | IG: lotusclub_socal |
- Bayside, California | IG: Bayside.California |
- Kinod | IG: k.i.n.o.d
Dream Car
The car of my dreams is here already. My little roadster exceeds all my expectations and continues to deliver. Also, it can wink. One thing I've learned by driving an underpowered convertible for over a decade is that I can often do with little what many struggle to do with much more; I like that. I think it's fun, and it surprises many.
What I am more interested in is experiencing the driving dynamics of different cars, so that's what my dream roster of cars looks like; I want to drive different powertrains, something FF, and MR, then 4WD, and RR. I still haven't owned a rotary, but that is also on the list. I hope to keep the Miata around forever, continuing to change or improve the setup, and maybe keep changing my second car as a continued driver's education.
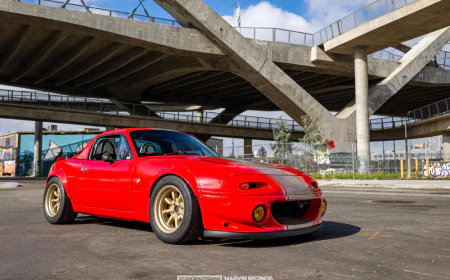
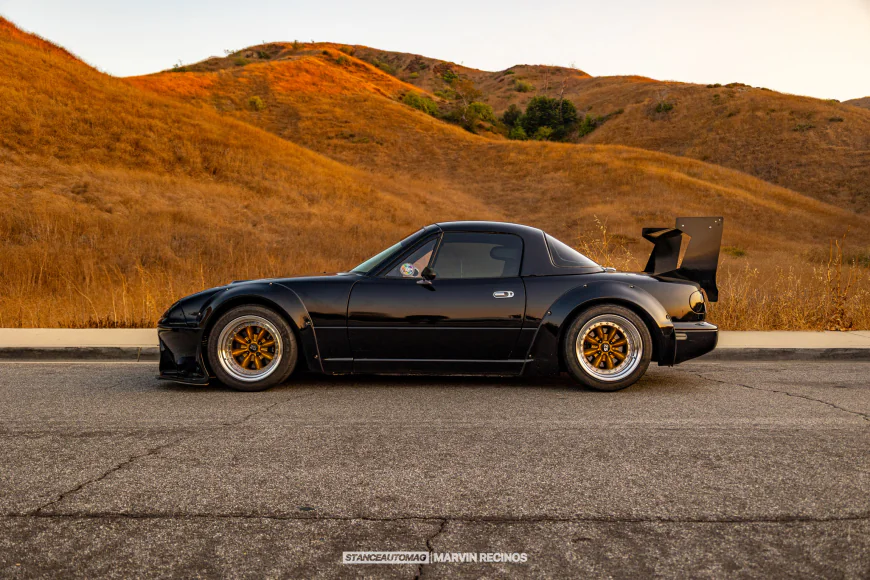
Dedin Johnson – Turbocharged, Static Fitment Perfect Combo
Yo, I’m Dedin Johnson, also known as DJ to many! I was born in Texas, grew up in a Military Brat lifestyle, travelling from time to time and ended up in Arizona twice, and now I’m living here on my own accord, so make it 3 times.
I’m married with 1 baby girl. As for the cars, that took me a while to get into. While going through college, my car at the time (98 ford escort zx2) had survived high school and helped me get to college for the first 2 years. At this time, I’m clueless about cars. My junior year, the head gasket blew, and being clueless on how to fix that, I continued to drive it (unknowingly) to get back to college.
Well, I made it successfully, and the car died in traffic. That’s when I took it to a local mechanic who diagnosed it. Not knowing much about cars at the time, I sold it for $200 and kept going on in life. Taking the shuttle to and from college.
Fast forward 2 years, and I graduate, and my gift from my parents was the money for a car ($4k). I went on the hunt, not knowing what to look for other than some Eg, or Ek Civics. That’s what I was into at the time, as I had seen my first modified cars on the freeway, 1 Ek, 1 Eg, both red, lowered, loud exhaust, with black rims.
That was my first moment into realising cars can be modified. So I went out looking for a Civic, when I saw on my last few days on campus was a red NA miata. Driving the wrong way on the road, to get on the sidewalk and barely clear a boulder (dubbed the shortcut). I had seen him do it a few times after that and I was so curious on the car. Once I found out what it was, I started doing some research on them, joined a forum, and was inspired to build a Miata my own.
Not knowing the following what miata’s have behind them. I continued to look on Craigslist and ended up finding a red Miata with a hardtop that had 84k miles on it. I chatted with the guy and talked him down to $3800. Did I mention this was a manual and I didn’t know how to drive stick at the time? Prior manual attempts occurred in a 98 Ford Ranger. They are night and day of a difference. I drove the car home without issue. It was slow, but forgiving.
2 red Civics are driving on the freeway, cutting up in traffic. After getting my own Miata, I was able to deep dive into the Miata community with clubroadster, Miata.net, and miataturbo being the primary ones. Over the years, I had read through countless build threads, taking inspiration from them all, better understanding how the Miata worked, what wheel specs worked best for some, what look I wanted to go for, just everything i saw I took inspiration.
I had a hunger to know how to work on cars, and I got my wish in more ways than one. Originally starting with when I got the Miata, I had to replace the leaky brake calliper. Then needing to replace the throw-out bearing and drop the transmission for the first time.
Once I successfully did the clutch and transmission job I felt like I could take on modifying the car, the standard garage vary front lip, and rear spoiler. To swap the stock diff with a 3.9 Torsen off a later year. I proceeded to get wheels and tires, and Coilovers (6UL, RS3’s, K-sports), which completely changed the feel of the car. Taking the car through the backroads felt planted and connected to the road. During this time, I continued to update my build thread forum style and stayed connected to the community.
I drove this setup for a few years until I was ready for the next upgrade, a DIY Megasquirt ECU. I had no clue how to put this together, so of course, this decision was made because my buddy Paul (the man with a soldering addiction) was willing to build it for me. So once that was done, he helped me install it and get the car running.
He taught me the basics of tuning and understanding what to look for. This of course, has me staring at the AFR gauge, not knowing fully what was good or bad, I went back home and did some more research to see what else it was capable of. I drove like this all the way to Texas to meet people from work and on the internet. A 17-hour drive, after doing a timing belt service the day before, for the first time. With the blue timing belt, it wears in as you drive and becomes dark. I was concerned it was rubbing the whole way there, until someone eased my concern, saying it’s normal.
Driving back home after that trip, meeting so many new people and making many new friends, I blew the head gasket. I drove it and made it home successfully, just to feel like I could handle anything. So I took on replacing the headgasket myself, resetting the timing took me a while, but ultimately everything went really well and the car was alive again!
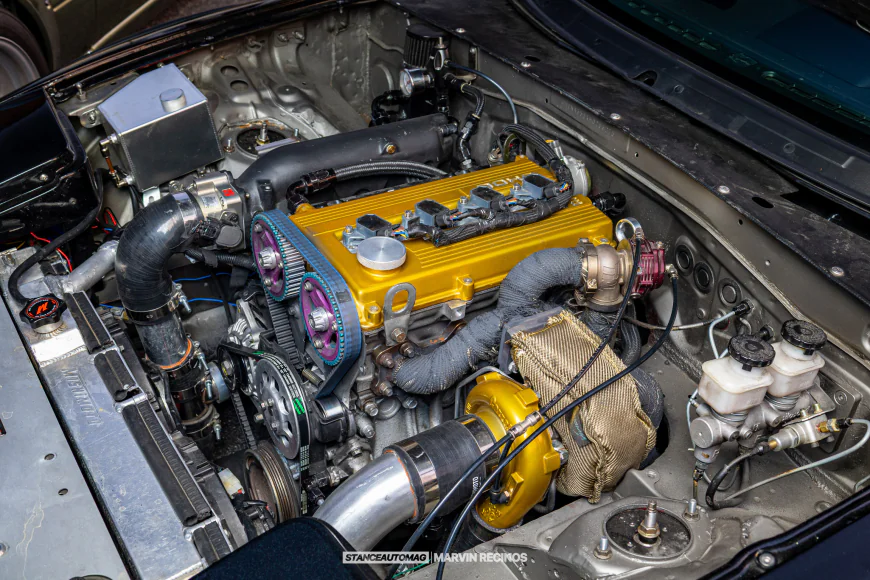
Many years later, I pieced together a turbo kit which consisted of Artech Turbo Exhaust manifold with external gate, and a downpipe (2”-3”) all professionally welded for my eBay disco potato GT82 turbo. I decided while the car was still working, I’d take it apart and have the motor built to bulletproof it from myself from making mistakes and not destroying the engine. So I took it to Duffys, an engine builder I was referred to by my buddy Pat.
While waiting for the Duffy’s shop I bought some Smaller flares to put on. I had a buddy of mine help me cut the fenders since he cut his fenders for his flares. Well 3/4 went well, the last one was too high and left a gap above the flare.
At this point, I knew my focus was going to be covering that hole, which would require bigger flares, bigger wheels, and tires. All which would take some time and set me back. From this moment forward, I wanted to take on any job myself, so I have no one to blame but myself. Once I got the Tuckin99 flares on, I was happy to see it covered the gap fully and without issue. At the same time, Jetstream headlights had come out, and I HAD to pick those up to change the overall look of the Miata.
I love pop-ups, but these were so unique that I had to have them. Once I got the flares and the jet streams on, I was just waiting on the engine to come back. Once I got the engine assembled (pistons, rods, and refreshed the whole bottom end. Valves and retainers, dual spring, stock cams. I eventually got everything on and together myself and drove it around without a full tune for many years. I never properly configured it for above 8psi to try and limit myself.
Given then was a freshly built engine that I just put a turbo on, and now I’m driving it. My stress level was at an all time high. Anytime I rolled into it I hit boost cut which I didn’t understand what it was doing then, so I just kept it half throttle most of the time, until I ended up getting a professional tune by UMStuning, making a healthy 214hp at 14psi! This was perfect! Until I wanted more power after another few years. In between then and now, I’ve gone through almost every single bolt on this car.
From the carpets, seats, fuel pump, paint, trunk, battery, fuel system, suspension & bushings (all of it), brakes, etc. The next time I went back with a real turbo (Garrett 2871r) and a 2.5”-3” exhaust, I had another buddy, Michael, help me make. I replaced the injectors for a used set of Injector Dynamic 1050 and an upgraded Walbro 460 fuel pump, and a flex fuel sensor, so I could support flex fuel, which worked out perfectly! Besides all the stress of building the car and having it put through its paces at the dyno, which was successful, the experience was awesome! Immediately after the tune, I took it out while still on race fuel, and it felt like a rocketship!
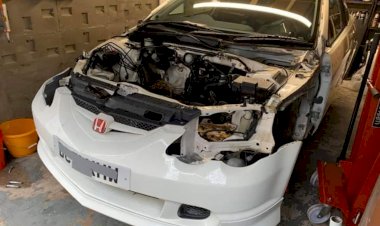
Now, before that tune, I saw the day before little fluid where the block meets the head, so I took the valve cover off and just retorqued the head bolts down to be safe but after the runs, it was worse when I got home. Needless to say, it was time for another head gasket, 6 years later. So, having done one before, I took just the head off this time, as the car did overheat when setting it up with the new ECU, cause the fan outputs are different for 1.6 vs 1.8 miatas. didn’t think anything of it at the time, but it must of been worse than I thought. Either way I took the head off, dropped it off at a machine shop and got it back in order again so I could appreciate my work once again!
Driving for the first time after all the changes, it really set me up to think how much further I can take this. Well, my mind doesn’t stop, and I had more things I want to do. Like swapping all of the suspension bushings with SuperPro poly bushings for the whole car. I was dreading this work, but with my impact and a couple tools, I was able to get the car in the air, and take all the bushings out of the car and replace them, including Zerk fittings as well! This took longer than I expected, with a 10-year-old Black and Decker and dull drill bits, but was a HUGE sense of accomplishment after completing the work myself.
I wanted to push myself even more so starting things with the wire tuck, I took the dash out and all the wires from the engine bay. I started to de-pin the fuse box, only to realize I could take the whole harness from the battery forward to prevent the de-pin and save me hours of time. Once that was pulled through I was able to make my cuts to get the wire hidden behind the fenders.
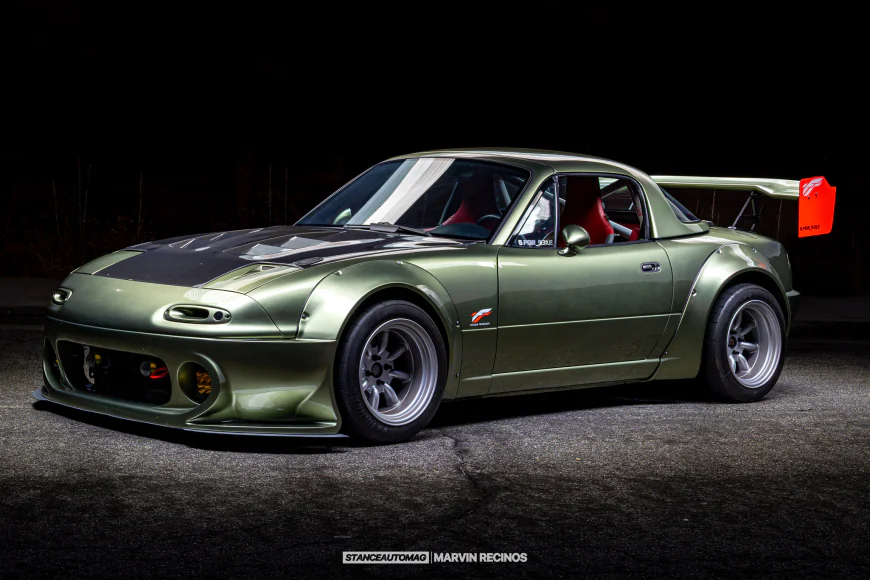
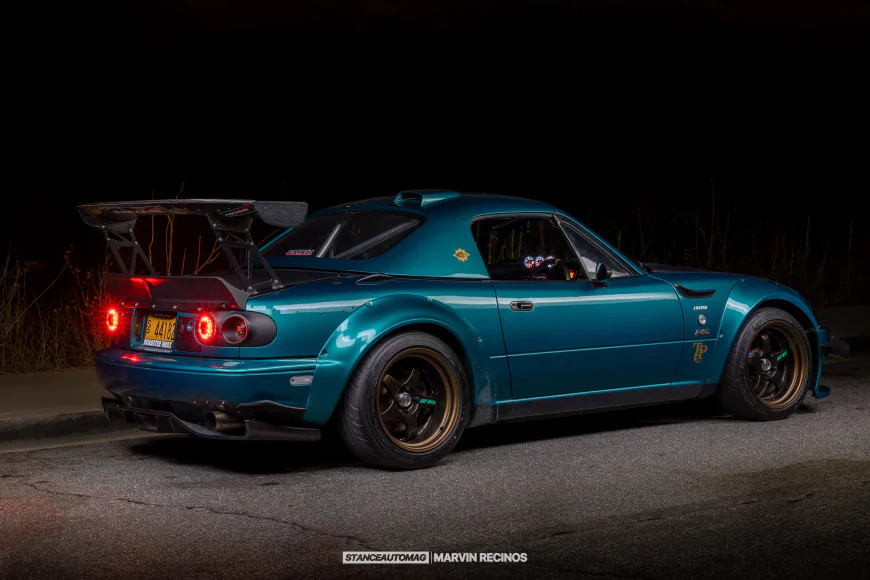
At the same time I started my brake tuck since I already had the dash out. I would never recommend doing both but for me it made sense. First time going through both processes together, it took me a few attempts at making the hardlines myself but once I got 1, I knew I could do the rest. I eventually got through both, and the first start and bleeding the brakes a few times (after a few leaks), I felt like I had really made something here but I wasn’t done yet. I had 1 major dream to achieve. Getting the NOPRO/ NOGAMI PRJOECT kit. I told myself if I could get it, I would. Or if I could find someone selling it, I would.
I did some research and found the website, the official website for it. With today’s technology, I could translate the entire page to English and see you could still purchase the kit…NEW. So I set out to reach Rev9autoparts who has helped me import my prior set of flares. They were able to help me in getting this kit. At first I didn’t believe it was happening, but of course I pulled the trigger and after a few short months… it was at my front door!
The excitement from opening the box after wanting this kit for ages was surreal. Seeing the official JGTC Miata with this kit was always stuck in my head, and now I can make a version of my own! Everything about this kit just screams JGTC, probably my favorite era of racing, because of the mix of cars going against one another!
Truly an unforgettable time! I was maybe the 2nd person in the US with this kit at the time and only 1 still in Arizona to this day. Once I got the kit on and test fit, the details of the kit put them ahead of the Tuckin99 flares prior. Line up marks on the flare itself so you know it’s in the right position was a huge difference.
Not to mention the bumper and front flares are bolted to one another as well. This kit really pushed this car to be something completely different than the norm. After getting the kit paint matched and putting it all together for the first time was eye-opening.
I had previously been running my tucking99 flares with SSR StarSharks in the original 4x100 wheels I had rebuilt to my spec by Love20Bee. These wheels were my dream wheels, and to see them on the car at the time was a dream come true in itself. I later purchased a set of Panasports G7’s in 4x100, I ended up building them myself, had them powdercoated and set out to seal them up myself. Got the tires transferred over and was insane to see it all come together and hold air after building them myself.
Putting the official wing from the original NoPro racecar, I was on the fence about it until I saw it on a non-No pro car. I ended up reaching out to find out how I could get my hands on the wing itself. Knowing no one really had one, and no one had one with a NoPro kit, I felt like it was something I needed to see for myself.
Going through NineLivesRacing, they still had the templates they had years ago. They also improved upon the original design with the option for dual elements to be used. Of course I had to complete the transaction to get the wing ordered and once it finally showed up, I was blown away to see TheeNoPro car in my own garage staring at me! I was truly blown away at what I created!
While there is some work required in getting the car out of the garage, once on the road, it’s a blast. Miata cornering with straight line speed! What more could I ask for!?
Dedin’s Build List
Built 1991 1.6l Miata
- Weisco pistons - stock bore
- Manley Rods
- Ace Rod Bearings
- Arp head studs
- 3 layer Cometic metal head gasket
- Dual Valve Springs and retainers
- Oem Valves
- Garrett 2871r standard 56 trim with vband and heat shielding
- Turbine AR: .86
- Capri valve cover with exposed HKS Cam gears
- GarageStar - C.O.P plate W Custom C.O.P system
- GarageStar - wiper cowel cover, and radiator cover
- GarageStar hardtop brackets
- GarageStar water pump and alternator pulley's
- ARTech turbo manifold with down pipe that was changed to adapt to vband
- To 3” oval stainless exhaust
- Enkei Sway bars with braces and endlinks
- Speedsage.Engineering block off plate for IAC
- Link G4X with the following sensors:
- -Fuel Pressure Sensor
- -Ethanol Content Sensor
- -CAN LAMBDA Sensor
- -VTPS
- -CAN Gauge/Display
- -Link Strada 5” Dash
- -EBC with 17PSI spring in wastegate
- 1050cc ID Injectors
- Radium Dual fuel rail with -6AN lines
- DeatschWerks 1:1 FPR running at 40psi at idle
- 1.6 engine
- 1.8 driveshaft and 3.9 Torsen, with Polly Diff mounts
- 1999 - 6-speed transmission
- Gracing 6 6-speed short shifter
- Mishimoto Radiator with Custom -16 AN lines
- Fab9 Intercooler
Exterior
- Jetstream headlights with upgraded LEDS with halos
- Motorcycle Headlights for Fog Lights
- Garage 502 mirrors
- Autokonexion duckbill trunk
- Stock trunk
- Stock trunk with spoiler extension
- Custom wire tuck
- Custom 5mm Wood Splitter
- Raceport BOV
Wheels and Suspension
- 15x9 and 15x10 4x100 SSR Starsharks with brushed barrels 10mm spacer for big brake clearance
- 15x9 and 15x10 4x100 Panasport G7 10mm spacer for big brake clearance
- Both were run on Maxxis Victra VR-1 tires 245/40/15’s
- Muteki lug nuts
- ARP Extended studs
- Reinhart coilovers
SuperPro Upper Control arms Front and Rear, Lower control arms Front and Rear - 949 Endlinks
- New OEM upper and lower ball joints
- Depowered steering rack with custom 350mm grip royal steering wheel with 3” spacer
- Wilwood 1" Brake master cylinder
- Wilwood 4 pot front brakes
- 1.6 rear brakes
- Custom brake tuck
Interior
- Thrash Racing Seat Pro Spec Sigma
- Destroy or Die modified seat bracket
- Zoom Engineering Radio Console
All maintenance done, and freshly painted Black from Red!
Who Did the Work?
The majority of the work has been completed by myself. In the beginning, I had my friend cut my flares, a buddy help install the DIY megasquirt, and that was it. The rest has been yours truly, enjoying the process as it was to get to where I am today.
Doing my own research to understand what it takes to complete the work, or just going headfirst at it to figure it out. None of my parts have been sponsor by anyone but myself. That’s part of the reason I don’t have any stickers on the car. I had shops do the powder coating, and some of the cast aluminum welding, Duffy’s built the bottom end and I assembled the engine itself.
Everything I thought I was able to do in-house, I attempted it and if it was successful, I would keep it that way, otherwise, I may contact a shop to complete some of that work, for example: Welding a bung on the valve cover.
Future Plans
My future plans at this time is to enjoy the car in its current form. I want to get this on track sooner than later to truly appreciate what I feel on back roads but full out. I’ve been building this car for 12 years and because of my unethical building methods, I didn’t get to drive it as much as I’d like in the beginning.
So I want to enjoy the car for what it is before I change it again. I will, however, be planning to add some side skirts and a rear diffuser, with a flat bottom! I need to complete the aggressive look I have in my head that needs to be put into the car.
That includes a potential V-mount setup for better cooling out here in Arizona with better performance overall. I’ve had this dream to chop the front end entirely so it’s similar to a Drag car where I can remove the front clip entirely. That would be amazing, but I’m in no rush to complete that part, this may be the last thing I do.
Shout Outs
- @Rev9autoparts
- Paul (no IG)
- Vinny (no IG)
- Duffy’s (no IG)
- Thecanadiantuxedo
Dream Car
My ultimate dream car would be a F40 but LM spec. A truly iconic car that was track-focused and ready to rip right out the gate.
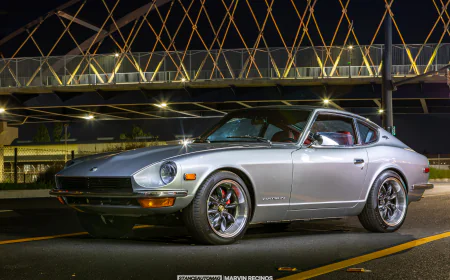
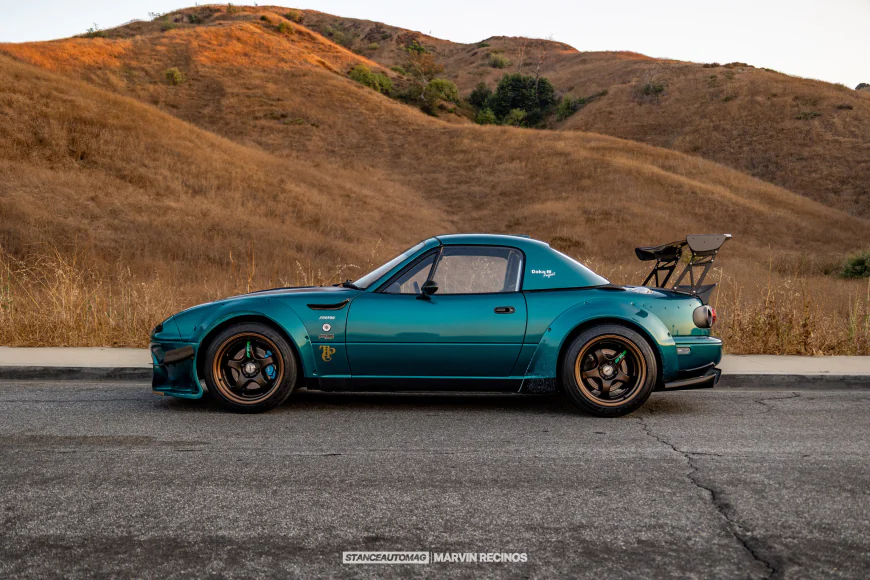
Nick Dryden – ITB Sayonara Limited JDM Heritage
Im Nick Dryden, 21 years old. None of my family was ever into cars, and I knew nothing about cars or tuning or working on cars before I got my first Roadster. I learned the basics on that, like wheel offsets, suspension work, interior work, and light engine tuning.
After that, I fell in love with the Miata and started importing parts and connecting with the community in my area as well as around the world, travelling to Thailand and Japan to see Roadsters. I am most inspired by those around me who are constantly pushing the standard in terms of their character and these cars. I started my company solely off the passion I have for this car and the dream of where it will take me.
Nick’s Build List
1997 Eunos Roadster SR Limited (1 of 700)
Exterior Outfit
- Nogami Project GT-L Widebody
- Barchetta Headlights
- Esqueleto Taillights
- Murikami Wing Mirrors
- Car Make Corns Rear finish panel
- Toyoshimacraft bonnet
- Mazdaspeed Lightweight vented hardtop
- Voltex GT Wing
- Rocket Bunny ducktail spoiler
- JetStream Suzuka diffuser
Engine and Drivetrain
- 2.1L Bored-up BP-VE Stroker Motor
- Toda 85mm Pistons
- Maruha Motors ITB Setup
- Maruha Motors 2way LSD
- 6-speed
- Car Make Corns custom exhaust
- Nielex short shifter
- Freedom ECU
- Maruha Motors clutch and flywheel
Wheel Setup
- 16x9 and 16x9.5 staggered Work Meister’s
- 205/45F, 225/45R Dunlop Direzza ZIII’s
Interior Outfit
- Okuyama roll cage
- M2 1028 “Street Competition” seats
- Nakamae Shift knob
- OMP Steering wheel
- RS Products gauge cluster
- JetStream center console
- DeFi external gauges
Suspension
- Cusco Zero-3 Competition Coilovers
- Mazdaspeed sway bars
- Nielex knuckle supports
- Maruha Motors upper control arms
- Maruha Motors full bushing replacement
Who Did the Work?
The car was built in Japan I imported this car in October of 2024, and before that it spent over 14 years being tuned by the best of the best Roadster Pro Shops in Japan. Maruha Motors, NoPro, RS Aizawa, and Car Make Corns, to name a few. The car has been meticulously crafted and honed over the past decade and it shows in the way it drives and feels.
Future Plans
Like Patrick and DJ, the toughest part now is maintaining it. I plan to replace most of the seals and continue to gain as many rock chips as I can enjoying every ounce this Roadster has to offer. If one day the right person comes along, the way I feel I did, it will go to them.
Dream Car
In terms of my dream car, it will always be the Roadster, not any particular one car, but the idea of the Miata. In my mind, it has solidified its place forever and I will continue to do my best to honour and uphold its legacy. But I guess a first-gen NSX wouldn’t be too bad!
Final Thoughts
Three Miata owners, three different visions: turbocharged power, rare JDM heritage, and widebody ITB precision. What unites them is passion—the kind that turns a small two-seater roadster into a lifelong project, a rolling reflection of its driver.
As each of them put it in their own words, the Miata isn’t just a car. It’s a journey.
Further Reading
- 1993 Supercharged Mazda Miata: Crafting a Dream Roadster – Read more
- Lennon Radcliffe Mazda Miata 1994 – Read more
- Joshua 2006 Mazda MX-5 Base Model Ricercar – Read more
- Mazda MX-5: The Ultimate Roadster – Read more
- 5 Cheap Japanese Cars You Can Modify: Unleashing Your Inner Auto Enthusiast – Read more
- Best Affordable Track Car Projects for Novices – Read more
- Stance Auto Magazine: Japanese Classic Cars Vol2 – Read more
- Stance Auto Magazine July 2025: A Worldwide Monthly Modified Car Magazine – Read more
- The 90's JDM Classics - June 2025 – Read more
- Stance Auto Magazine Modified BMWs 2025 – Read more
- The RWB Porsche Magazine from Stance Auto: Akira Nakai – Read more
- Stance Auto Magazine JDM Classics The 90s – Read more
- Modified Japanese Classic JDM Cars Magazine – Read more
Call to Action
Do you have a build story like this one? Got a build on a budget? We want to see it. Submit your story to Stance Auto Magazine, and you could be the next featured owner showing the world how to do it right—without breaking the bank.
 Like
0
Like
0
 Dislike
0
Dislike
0
 Love
0
Love
0
 Funny
0
Funny
0
 Angry
0
Angry
0
 Sad
0
Sad
0
 Wow
0
Wow
0