


.png)


![[HOONIGAN] Ken Block's GYMKHANA NINE](https://img.youtube.com/vi/_bkX5VkZg8U/maxresdefault.jpg)


![[HOONIGAN] KEN BLOCK'S GYMKHANA SEVEN: WILD IN THE STREETS OF LOS ANGELES](https://cdn.motor1.com/images/mgl/2KlO4/s1/ken-block-london-tour-directors-cut.jpg)


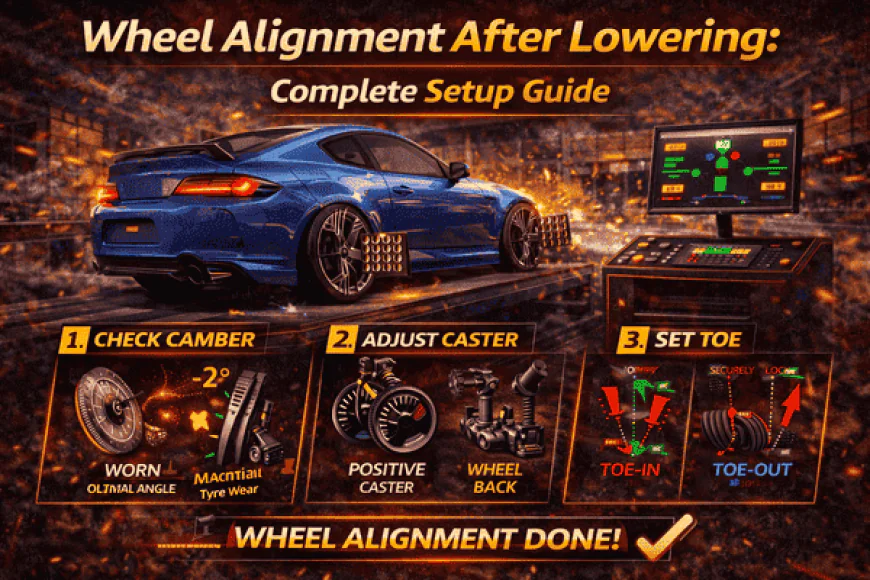
Wheel Alignment After Lowering: Complete Setup Guide
Read Stance Auto Magazines' complete wheel alignment guide after lowering your car. Camber, toe, caster settings, costs, and proper setup in 2026.
More Images On Our Facebook Page and Instagram Page. Join Our Car Community Today! Feel Free to share and backlink to our articles.
Why Alignment Is Mandatory After Lowering
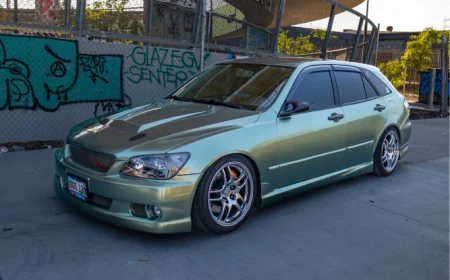
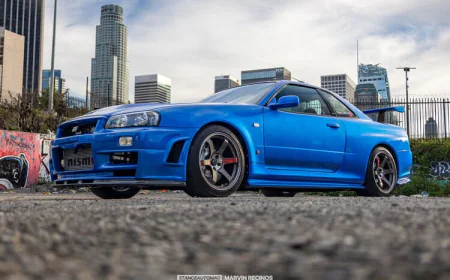
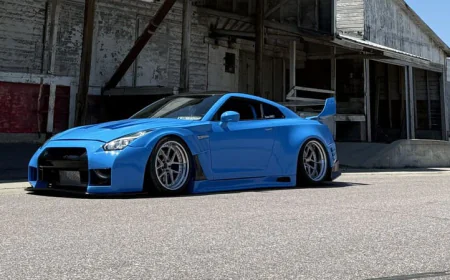
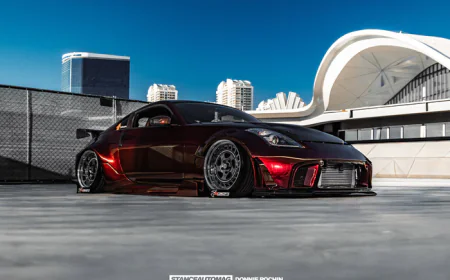
Lowering your car changes suspension geometry. Drop your car 40mm and suddenly the camber goes from -1° to -2.5°, toe changes, and the car drives terribly. Tires wear unevenly in 2,000 miles. The car pulls to one side. Handling feels vague and unpredictable.
Getting proper alignment after lowering isn't optional — it's absolutely essential. This guide covers what changes when you lower, what alignment settings you need, how to adjust them, costs, and the difference between basic alignment and performance setup.
For lowering guidance, see our springs vs coilovers guide and drift car setup. For suspension setup inspiration and perfectly aligned builds, browse our magazines on Amazon.
What You'll Learn:
- How lowering affects geometry
- Camber, toe, and caster explained
- Alignment specifications for lowered cars
- Adjustment methods
- Costs and DIY options
What Lowering Does to Suspension Geometry
Camber Change
Stock height: -0.5° to -1.0° (slightly negative) After 40mm drop: -2.0° to -3.0° (much more negative)
Why: Lowering compresses suspension, pulling top of wheel inward
Effect: Excessive camber = poor straight-line traction, inner tire wear
Toe Change
Stock: Usually slight toe-in (0-2mm total) After lowering: Can go toe-out or excessive toe-in
Effect: Incorrect toe = rapid tire wear, poor tracking
Caster (Less Affected)
Usually, there is minimal change from lowering
Effect: Slightly altered steering feel
Alignment Settings Explained
Camber
What it is: Angle of wheel top-to-bottom (viewed from front)
Negative camber: Top tilts inward (/) Positive camber: Top tilts outward () Zero camber: Vertical (|)
Effects:
- More negative = better cornering grip, worse straight-line traction
- Too much negative = excessive inner tire wear
Toe
What it is: Angle of wheels pointing in/out (viewed from above)
Toe-in: Front of wheels closer together (λ) Toe-out: Front of wheels further apart (Y) Zero toe: Parallel (| |)
Effects:
- Toe-in = stability, slight understeer
- Toe-out = turn-in response, instability
- Incorrect toe = rapid tire wear
Caster
What it is: Angle of steering axis (viewed from side)
More caster = more self-centering, heavier steering, better high-speed stability
Recommended Settings for Lowered Cars
Street Performance (40-60mm drop)
Front:
- Camber: -1.5° to -2.5°
- Toe: 0mm to +1mm total (slight toe-in)
- Caster: Maximum available (+6° to +8°)
Rear:
- Camber: -1.0° to -2.0°
- Toe: +1mm to +2mm total (toe-in)
Result: Balanced handling, acceptable tire wear, street drivable
Aggressive Street/Show (60-80mm+ drop)
Front:
- Camber: -2.5° to -3.5°
- Toe: 0mm to +1mm
- Caster: Maximum available
Rear:
- Camber: -2.0° to -3.0°
- Toe: +1mm to +2mm
Result: Aggressive look, compromised tire wear, careful driving needed
Track/Performance
Front:
- Camber: -2.5° to -3.5° (depends on tire)
- Toe: 0mm to +0.5mm
- Caster: Maximum
Rear:
- Camber: -2.0° to -2.5°
- Toe: +1mm to +2mm
Result: Maximum grip, rapid tire wear, track-focused
How to Adjust Alignment
Camber Adjustment
Options:
1. Camber bolts (£40-80):
- Replace stock eccentric bolts
- Adjustment: -0.5° to -1.5° typically
- Good for mild lowering
2. Camber plates (£200-500):
- Replace top mounts
- Adjustment: -3° to -5° typically
- Best for aggressive lowering
3. Adjustable control arms (£300-800):
- Full adjustment range
- Most flexible solution
- Required for extreme drops
Toe Adjustment
Most cars:
- Adjustable tie rods (standard)
- Turn to adjust toe in/out
- Simple, cheap adjustment
Some cars need:
-
Adjustable rear toe arms (£200-400)
Caster Adjustment
Usually requires:
- Caster-adjustable plates (£300-600)
- Or offset bushings (£100-200)
Many cars: Not adjustable without aftermarket parts
Alignment Process
Step 1: Set Ride Height
Critical: Alignment must be done at final ride height
If adjusting height after alignment, alignment will be wrong
Step 2: Professional Alignment
Cost: £80-150
Process:
- Measure current alignment
- Adjust to specified settings
- Test drive
- Verify settings
Time: 1-2 hours
Step 3: Verify and Adjust
After 500 miles:
- Re-check alignment (suspension settles)
- Adjust if needed (often free within 30 days)
DIY Alignment (String Method)
Possible but not recommended for lowered cars.
Requires:
- Level surface
- String lines
- Measuring tools
- Patience
- Experience
Limitations:
- Toe: Can measure reasonably
- Camber: Difficult without gauge
- Caster: Impossible to measure accurately
Verdict: Pay for professional alignment
Alignment Costs
Basic Alignment
Cost: £50-80 Includes: Toe adjustment only (front and rear) Good for: Stock cars, minor adjustments
Full Alignment (4-Wheel)
Cost: £80-150 Includes: Camber, toe, caster (all adjustable parameters) Good for: Lowered cars, modified suspension
Performance Alignment
Cost: £150-300 Includes: Full alignment + corner balancing + detailed adjustments Good for: Track cars, competition builds
Multiple Visits
Many shops: Free re-alignment within 30 days Useful: Suspension settles after lowering
Signs Your Alignment Is Wrong
Symptoms
- Car pulls to left or right
- Steering wheel off-center when driving straight
- Uneven tire wear (inside or outside edges)
- Squealing tires on turns
- Vague, disconnected steering feel
- Vibration at highway speeds
Tire Wear Patterns
Inside edge wear: Excessive negative camber or toe-out Outside edge wear: Excessive positive camber or toe-in Feathering: Incorrect toe Center wear: Overinflation (not alignment)
Common Mistakes
1. Lowering Without Alignment
Problem: Drive on lowered car without alignment Result: Ruined tires in 1,000-2,000 miles
Solution: Alignment immediately after lowering
2. Excessive Negative Camber
Problem: -4° or more for street use Result: Terrible straight-line traction, rapid wear, dangerous in wet
Solution: Keep front camber -2.5° to -3.5° maximum for street
3. Toe-Out on Rear
Problem: Setting rear toe-out for "better turn-in" Result: Unstable, dangerous, snap oversteer
Solution: Always toe-in on rear (never toe-out)
4. Aligning Before Ride Height Settled
Problem: Alignment immediately after coilover install Result: Suspension settles over 500 miles, alignment wrong
Solution: Drive 500 miles, then align (or get free re-alignment)

Frequently Asked Questions
How often should I get an alignment after lowering?
Initially: immediately. Then: every 10,000 miles or if hit curb/pothole hard.
Will lowering affect my alignment?
Yes, dramatically. Camber and toe both change significantly.
Can I daily drive with aggressive alignment?
Yes, but tyre wear accelerates, wet traction suffers, and fuel economy may decrease.
How much negative camber is too much for the street?
Over -3.5° front, -3.0° rear = excessive for street. Track: up to -4° acceptable.
Why is alignment so expensive?
Equipment costs £30k+, expertise required, time-consuming process.
Can I align just the front?
Lowered cars need 4-wheel alignment. Rear alignment matters too.
Related Articles
- How to Lower Your Car: Springs vs Coilovers
- JDM Wheel Fitment Guide
- Drift Car Setup Guide
- Passing MOT with Modified Suspension
 Like
0
Like
0
 Dislike
0
Dislike
0
 Love
0
Love
0
 Funny
0
Funny
0
 Angry
0
Angry
0
 Sad
0
Sad
0
 Wow
0
Wow
0