

































































































.png)












![[HOONIGAN] Ken Block's GYMKHANA NINE](https://img.youtube.com/vi/_bkX5VkZg8U/maxresdefault.jpg)















































































![[HOONIGAN] KEN BLOCK'S GYMKHANA SEVEN: WILD IN THE STREETS OF LOS ANGELES](https://cdn.motor1.com/images/mgl/2KlO4/s1/ken-block-london-tour-directors-cut.jpg)






































Car Wiring Connectors: Why Good Wiring Matters More Than Your Next Mod
Car wiring connectors decide whether your mods work or fail. Learn how to choose the right cable, fuses, relays, earths and crimps so every circuit you add is reliable and safe.
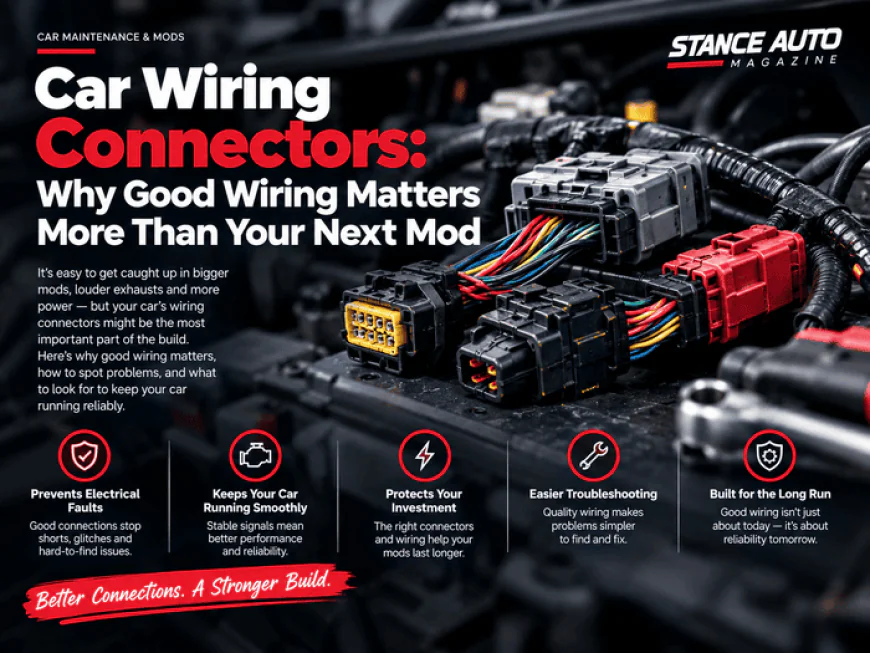
Everyone loves the visible part of a build. The wheels, the stance, the lights, the gauges on the A-pillar. Nobody posts a photo of a fuse holder. But if you've ever had a car that randomly cuts out, a light bar that only works when it feels like it or an amp that gets suspiciously warm, you'll know the truth: the wiring underneath decides whether your mods are a joy or a constant headache, and it all starts with your car wiring connectors.
I've fixed enough of my own shortcuts over the years to know that doing it properly the first time is always cheaper, faster and a lot less stressful than chasing a fault at a car meet.
What This Car Wiring Guide Covers
This guide is for anyone adding electrics to their car, whether that's extra lighting, gauges, an electric fan or a new sound system. I'll explain the basics of cable, fuses, relays and earths in plain language, show you why car wiring connectors deserve more attention than they usually get and walk you through planning a new circuit step by step. No electrical engineering degree needed, just a bit of patience and the right parts.
Why Wiring Makes or Breaks a Build
Most electrical problems on modified cars don't come from the parts themselves. They come from the way those parts are connected. A loose crimp, a wire that's too thin, a missing fuse or a poor earth can cause flickering, voltage drop, blown fuses and, in the worst case, a fire. Bad wiring also tends to hide. It might work perfectly for months and then fail on a wet winter morning when water finally finds its way into a cheap joint.
The good news is that wiring things properly isn't difficult. It just takes a bit more planning than grabbing a roll of wire and some tape. And if you're still deciding what your next project should be, there's plenty of car culture and build inspiration out there to get the ideas flowing, including the Stance Auto Magazine store on Amazon if you fancy some reading while you plan.
The Basics: Power, Protection and a Good Earth
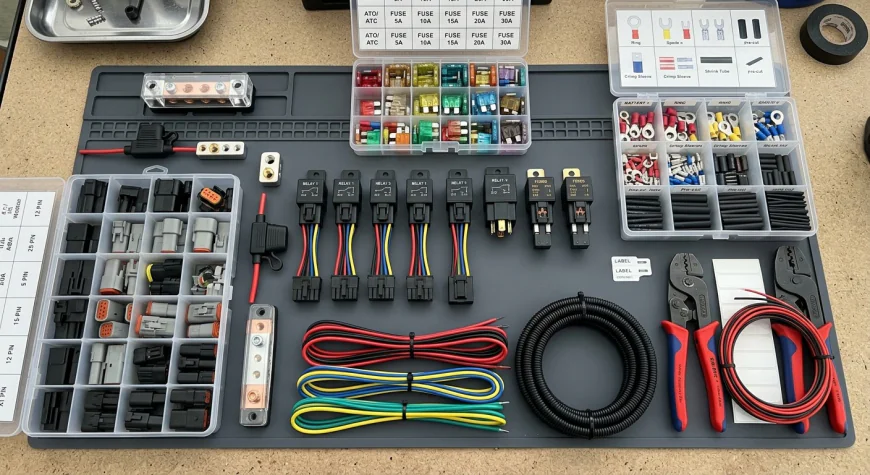
Almost every circuit you add to your car needs four things: a power feed, protection, a way to switch it on and off and a solid return path to the battery. Get those right and you've done most of the work, and your car wiring connectors will have a much easier life too.
Cable That's Thick Enough for the Job
The more current an accessory draws, the thicker the cable needs to be. Wire that's too thin has too much resistance for the load. It heats up, wastes power and means your accessory gets less voltage than it should, so lights look dimmer and fans spin slower. Length matters too, because the longer the cable run, the more voltage you lose along the way.
Always check how much current your accessory draws, then choose a cable rated comfortably above that for the length you need. Use flexible automotive cable rather than household wire, which isn't designed to handle constant vibration and will eventually crack.
Fuses Protect the Wire
This is the one people get wrong most often. A fuse isn't there to protect your new light bar. It's there to protect the cable. If a wire gets pinched and shorts against the body, the fuse blows before the cable can overheat and melt its insulation. That's why the fuse should sit as close to the battery or power source as possible, and why its rating should never be higher than what the cable can safely carry.
If a fuse keeps blowing, it's telling you something. Find out why rather than fitting a bigger one.
Relays Do the Heavy Lifting
Most dashboard switches aren't built to carry the current that a light bar, a fan or a fuel pump needs. A relay solves that. The small switch on your dash only powers the relay's coil, and the relay then switches the heavy current on its own, using a short, thick cable straight from the fused battery feed. The result is a switch that stays cool, less voltage drop and an accessory that works the way it should.
Never Underestimate the Earth
A surprising number of strange electrical faults come down to a bad earth. Current needs a clean path back to the battery, and a terminal bolted to paint, underseal or rust simply won't provide one. Scrape the contact area down to bare metal, use a proper ring terminal and protect the joint against corrosion once it's tight. If you're adding high-current kit, it's also worth checking the earth straps between the engine, the body and the battery, because a tired factory strap can cause problems that look like they come from your new parts.
Choosing the Right Car Wiring Connectors
Connectors are where a lot of builds quietly fall apart. Every joint is a potential weak spot, so it pays to use automotive connectors that are designed for vehicles. Look for car wiring connectors that match your wire size, have the right number of pins for the job and are rated for the current running through them. If you're replacing a damaged factory plug, the part number on the old housing is your best friend, because it lets you find an exact match rather than a lookalike.
Specialist suppliers make this a lot easier. ConnectorRoute, for example, lets you search vehicle connectors, housings, crimp contacts, fuses and relays by part number or reference, which saves a lot of guesswork when you're trying to match what's already on the car.
Crimp Properly
A good crimp is strong, reliable and quick to make, but only with the right tool. The cheap combination pliers that come with a box of assorted terminals tend to squash the terminal rather than form a proper crimp, and that joint can work loose over time. A ratchet crimping tool that matches your terminals makes a huge difference. Once you've crimped a terminal, give the wire a firm tug. If it moves, cut it off and do it again.
Many auto electricians prefer a quality crimp over soldering for wiring that sees a lot of vibration. Solder makes the wire stiff right next to the joint, and that stiff point is where it can crack over time.
Seal Anything That Sees Weather
Anything in the engine bay, the wheel arches or under the car needs to be protected against water. That goes double for car wiring connectors, because water finds the weakest joint every time. Use sealed connectors with a rubber seal on each wire, and finish exposed joints with adhesive-lined heat-shrink. Tap connectors that clamp onto an existing wire are quick, but they can cut through strands, let moisture in and cause intermittent faults later. Avoid them, especially near anything important.
The Parts and the Mistakes I See Most Often
Each part of a circuit has one job, and each has a classic way of being messed up. Cable carries the current to the accessory, and the usual mistake is using wire that's too thin for the load. The fuse protects that cable from overheating, and the mistake there is fitting a bigger fuse because the old one kept blowing. A relay lets a small switch control a big load, and people skip it by running a heavy draw straight through a dashboard switch. The earth gives the current a way back to the battery, and it gets bolted to a painted or rusty surface far too often. Finally the connector joins wires so they can be separated later, and the usual crime is twisted wire and tape or cheap tap connectors. Avoid those five and you've dodged most of the faults I see at meets and on forums.
Planning a New Circuit Step by Step
Start with the accessory. Check how much current it draws and whether it needs to work all the time or only when the ignition is on. That tells you where the power should come from and whether you need a relay.
Next, plan the route. Decide where the fuse, relay and switch will go and how the cable will travel from the battery to the accessory. Keep wires away from hot parts such as the exhaust manifold and away from anything that moves, like the steering or the suspension. Where cables pass through metal, always use a rubber grommet so the edge can't cut into the insulation.
Then choose your parts: cable thick enough for the current and the length, a fuse that suits the cable, a relay for anything that draws more than a dashboard switch can handle and car wiring connectors that suit the location. Only then start cutting wire. It sounds slow, but an hour of planning saves a weekend of fault-finding.
Finally, test everything before you tidy it away. Check that each function works, that nothing gets warm and that the fuse holds when everything is switched on at once.
Making It Tidy and Reliable
A clean install isn't just about looks, although it definitely helps on show day. Cover your wiring with split conduit or braided sleeving, secure it with cable ties at regular intervals so it can't rub or flap around and leave a little slack wherever the engine moves on its mounts.
Label your wires at both ends and keep a simple diagram of what you've added. Future you will be very grateful the next time something needs fixing. And don't forget to tell your insurer about your modifications, because undeclared changes can cause real problems if you ever need to make a claim.
Final Thoughts on Car Wiring Connectors
Wiring might not be the most exciting part of a build, but it's the part that decides whether everything else works. Spend a little extra on good car wiring connectors and you'll rarely think about them again. Use cable that's thick enough, fuse it close to the source, let relays handle the heavy loads, give every circuit a clean earth and choose car wiring connectors that are made for life on a car. Do that and your mods will work every time you hit the switch, from the drive home to the next show.
Want more build guides, tech tips and modified car culture? Head over to Stance Auto Magazine for the latest features and builds.
 Like
0
Like
0
 Dislike
0
Dislike
0
 Love
0
Love
0
 Funny
0
Funny
0
 Angry
0
Angry
0
 Sad
0
Sad
0
 Wow
0
Wow
0